

Clean-MVP with Swift: News App


In the first article, we talked about the theoretical part of Clean-MVP architecture and what it represents. In this article, we will get our hands dirty with code and build a small but convenient iOS News App using Clean-MVP architecture, UIKit, and of course, Swift!
This article assumes that you're familiar with the Clean-MVP architecture and the concepts that it adopts, so I would recommend that you read the first article before diving deep into this example, you can read the first article from here. And don't worry, it's only a 6-mins read.
But for now, let's start coding!
Layers of the app
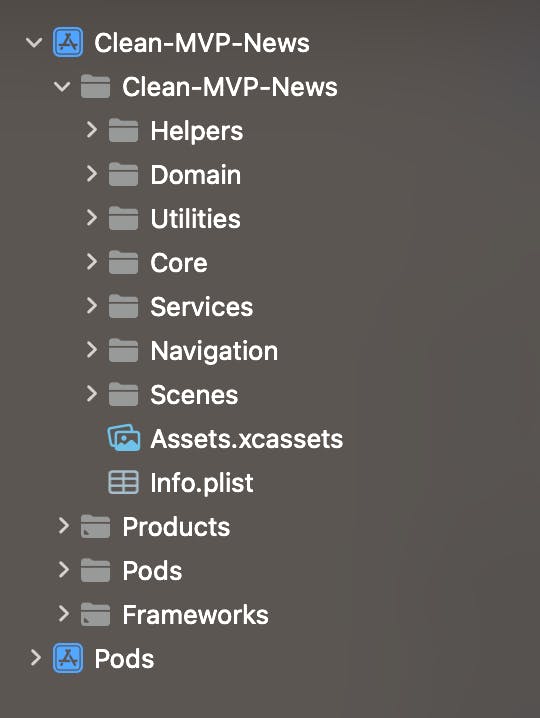
Let's first start talking about the different layers in our News app. Our app will be divided into the following layers:
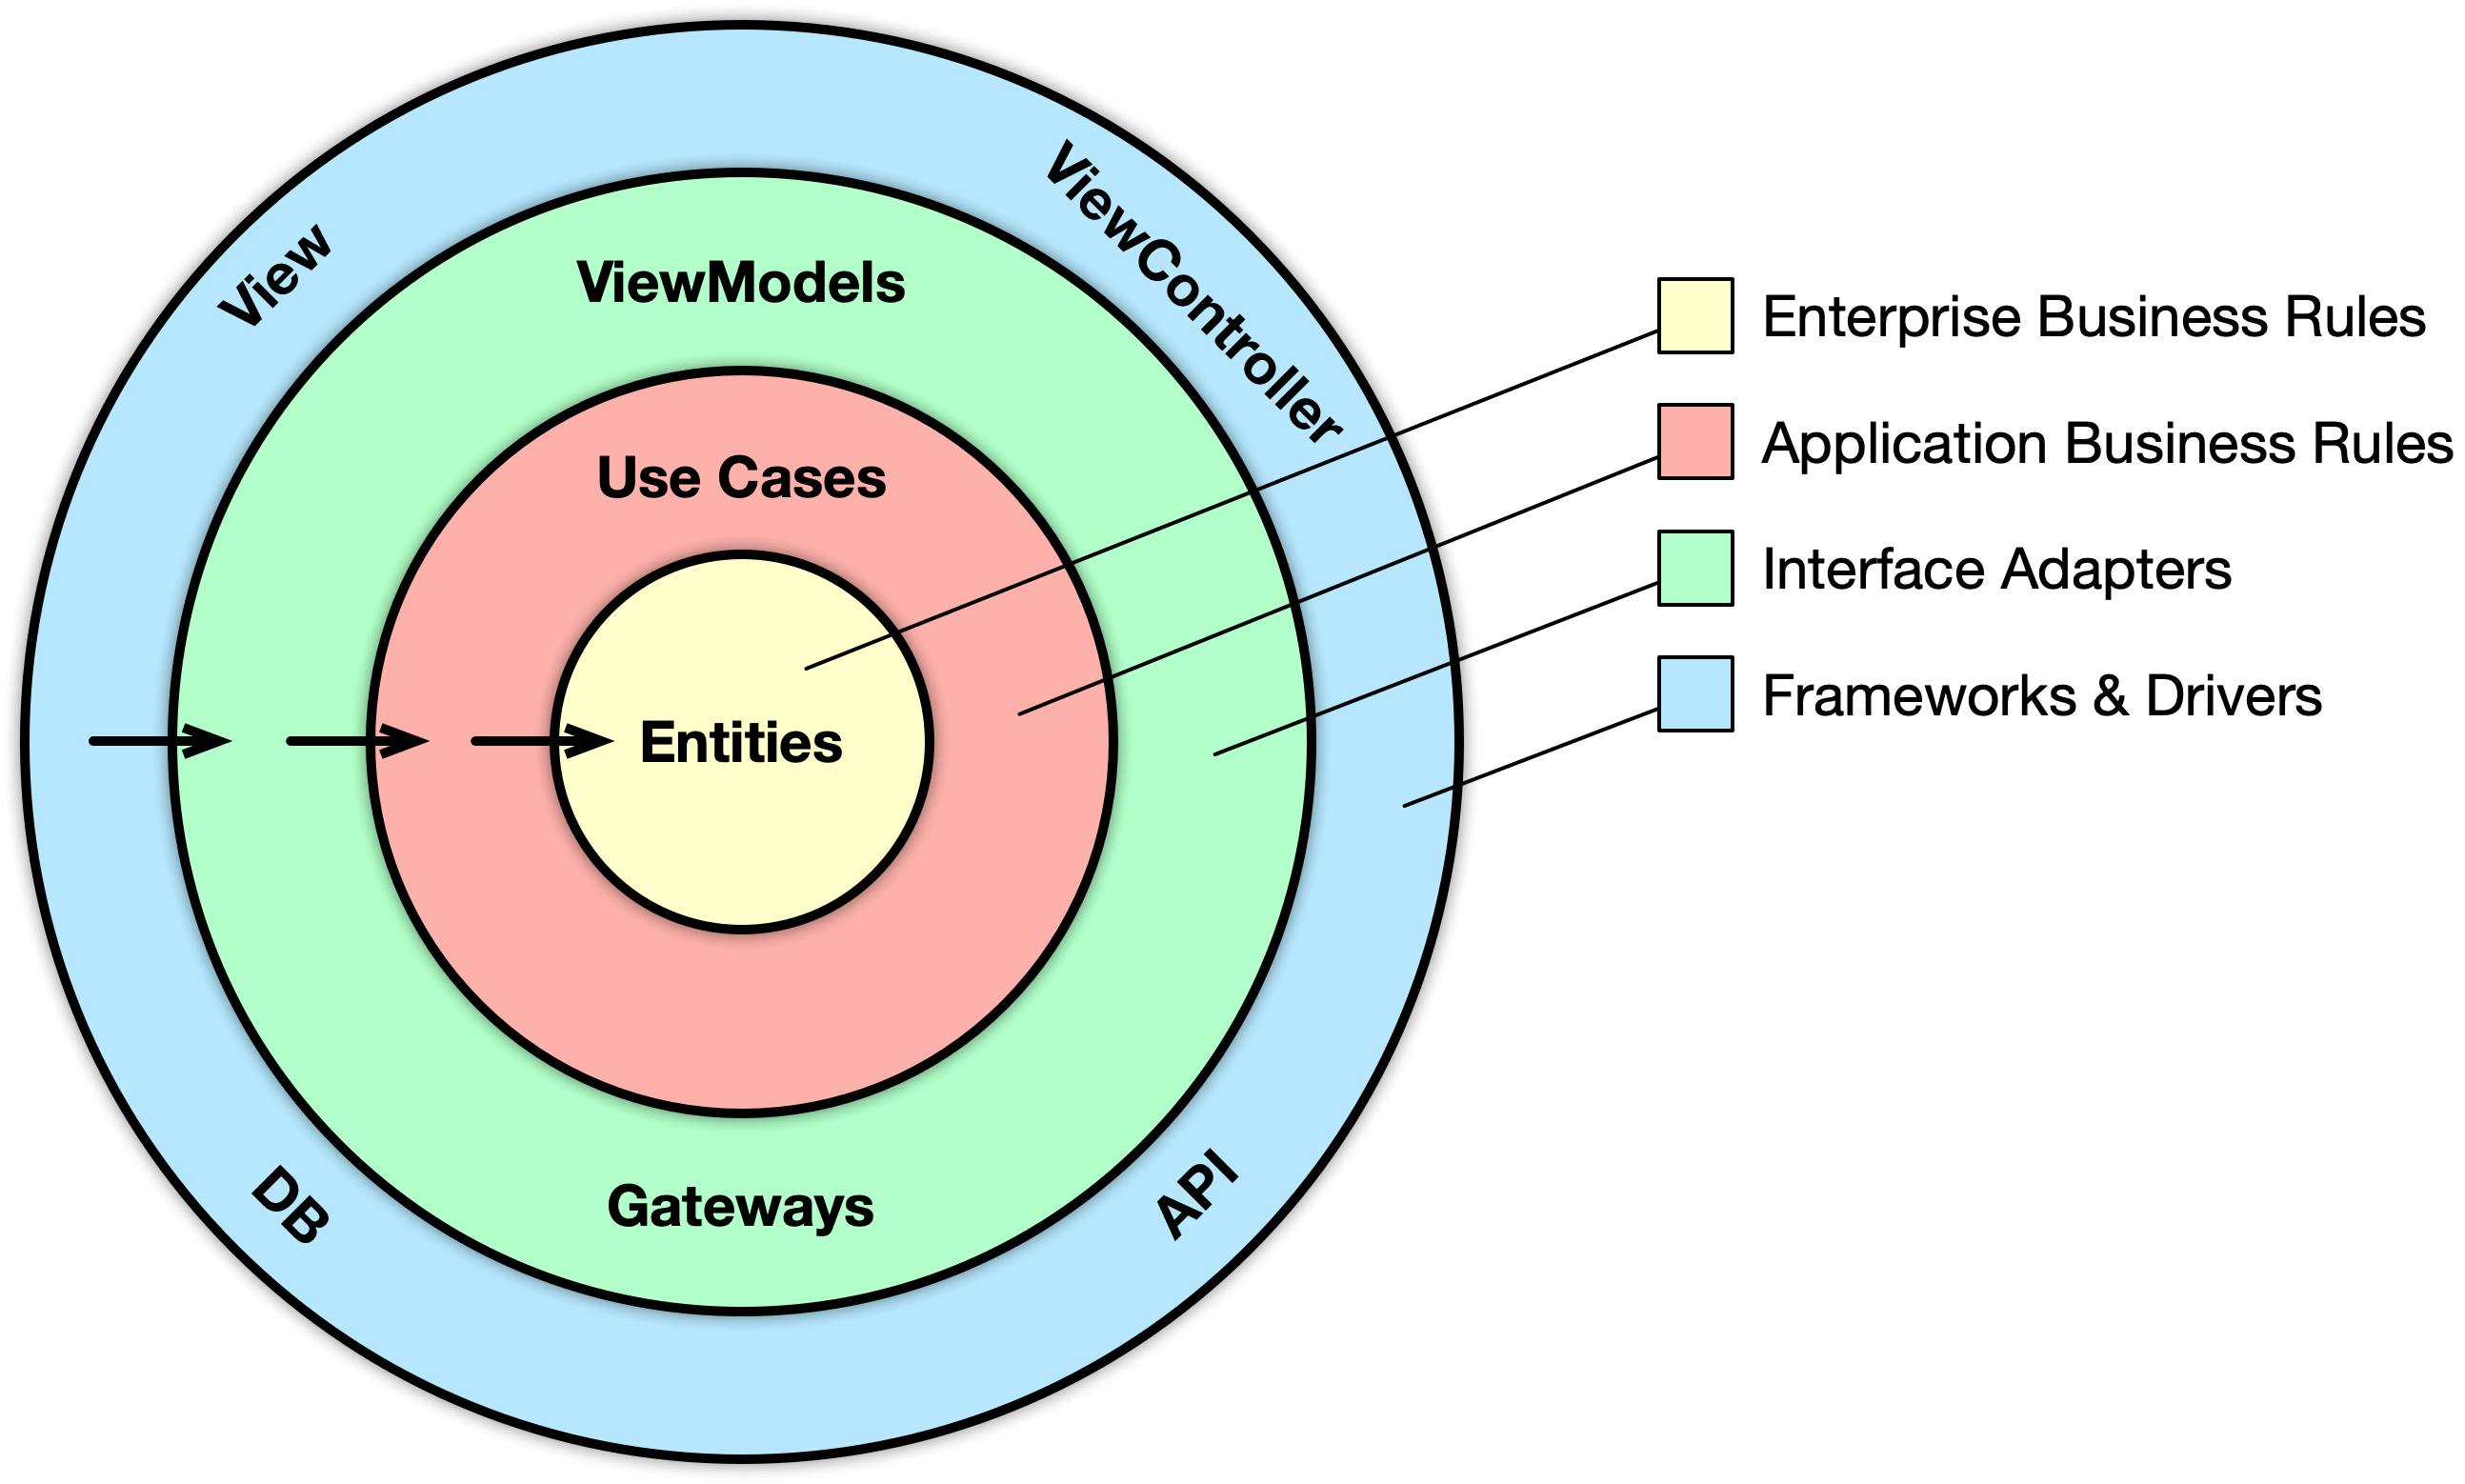
Let's recall the Clean Architecture layers:
1- Core: This layer contains all files that are considered a core for the app, like AppDelegate, SceneDelegate, etc... Some people prefer to put these files outside folders and keep the layers representing the Clean Architecture layers only.
2- Scenes: This layer represents the Presentation layer from the Clean Architecture, it contains our chosen UI Design Pattern (MVP in our case) components.
3- Services: This layer represents the Data layer from the Clean Architecture, it contains the API definition, database and network managers, and everything needed to have a meaningful state for the app.
4- Navigation: This layer is the Router in our app, it defines everything needed to implement the router and its logic throughout our app. It's considered a part of the Presentation layer of the Clean Architecture since it handles the UI flow.
5- Utilities: This is a simple layer that contains access to AppStrings and AppConstants that are used all around the app.
6- Domain: This layer represents the Domain layer from the Clean Architecture, it contains the Entities (data models) for the app.
7- Helpers: This folder contains all helper files that make our work easier in our project.
After laying out our layers and explaining what each one of them does and represents, we can now dive into the code and see how we will implement the app.
News app implementation
So, let's take the News app creation process into steps, the app should do the following:
Show a list of news on the main screen with the headline and the image of the news.
When the user clicks on one of the news, the user is redirected to a detailed screen that shows all the information for the clicked news.
Let's start with our main screen!
Main Screen Implementation
Let's start with the main screen, this is the design of the screen we want to build:
As we can see, we've added the UI for the main screen and we will use a custom TableViewCell to show the data on the Main screen. Now we're all set to start creating the logic we want to implement for this screen. From the definition, the main screen should:
- Show a list of news on the main screen with the headline and the image of the news.
So, the work for the main screen should be as the following:
Create the network manager that handles our API calls.
Create the network request for all news (UseCase).
Create the MainPresenter to handle the logic for the MainViewController.
Populate the MainViewController with data.
For this project, we will be using the Alamofire library to create a Networking layer that's generic, reusable, and easy to extend. This is our first step in creating the Data layer from the Clean Architecture for our project.
Network Layer
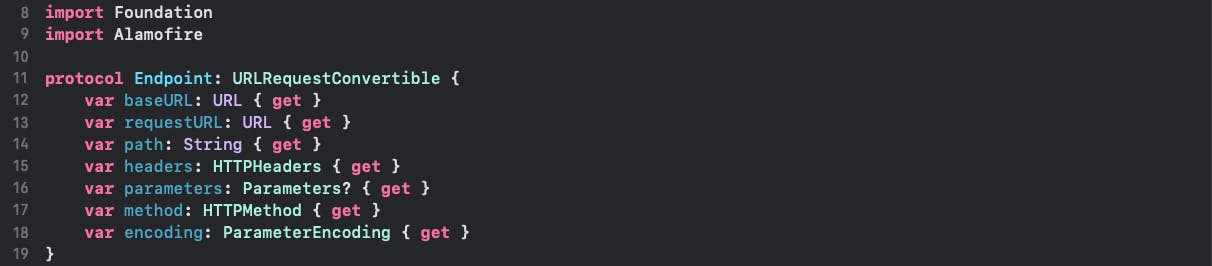
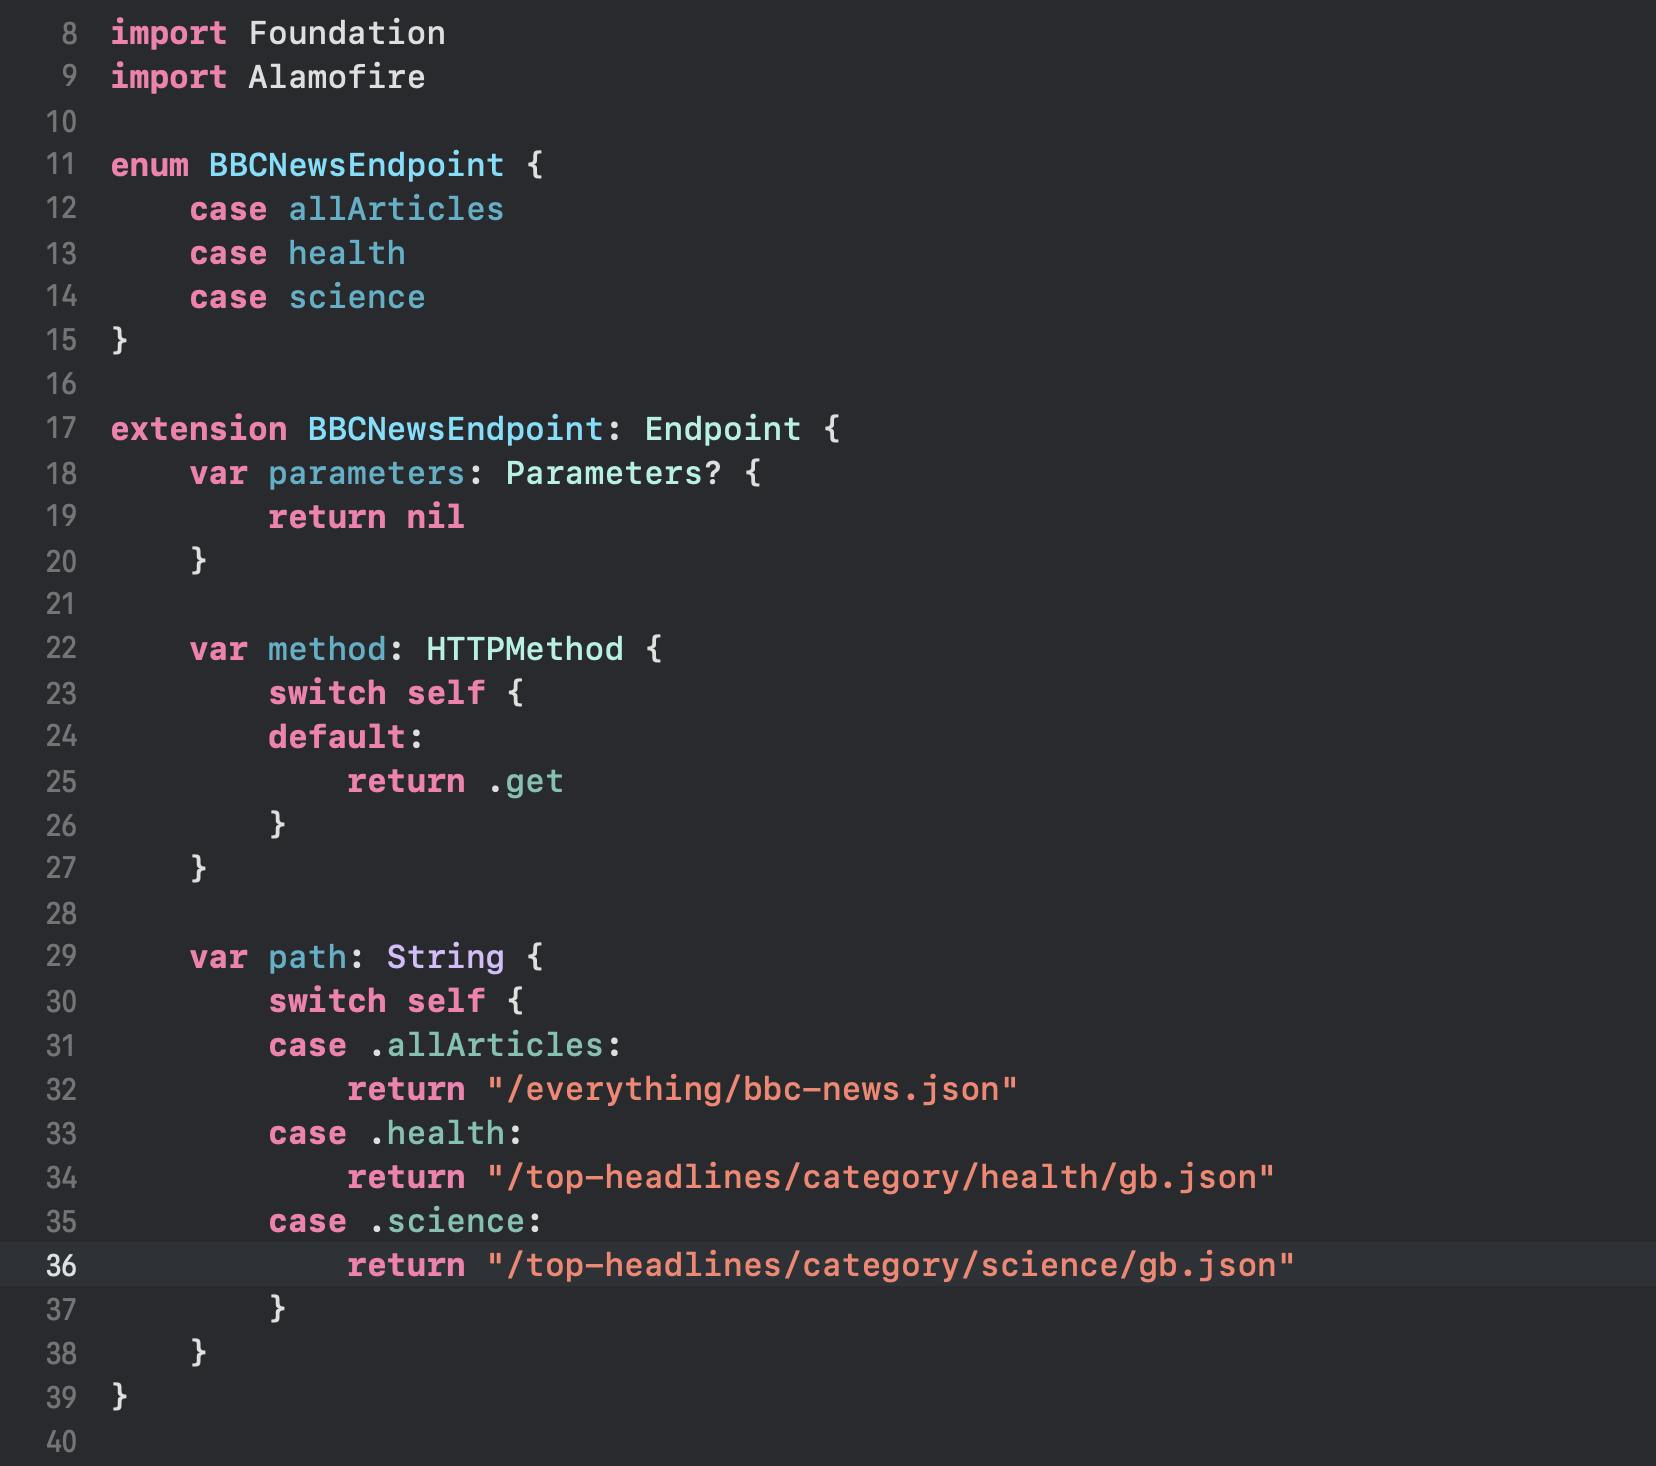
Let's start building our networking layer, we need to create a way to handle different endpoints and the requests used to hit those endpoints, we are dealing with RESTful API endpoints in our app, so we will start by creating a protocol called Endpoint that extends URLRequestConvertible from Alamofire library, this protocol will contain everything related to creating a URLRequest for each of our endpoints. Conforming to Alamofire's URLRequestConvertible protocol requires us to implement a throwing function called asURLRequest() with the following signature:
func asURLRequest() throws -> URLRequest
This function creates the URLRequest from the passed data for each endpoint created and returns it to be used directly.
With this in mind, our Endpoint protocol should look like the following:
And this is an extension to set up some basic and default implementation for the protocol:

And this is our implementation for our main news endpoint from BBC News:
Now let's start creating our AlamofireNetworkManager that will handle the API calls to fetch the data, the implementation of the manager should look like this:
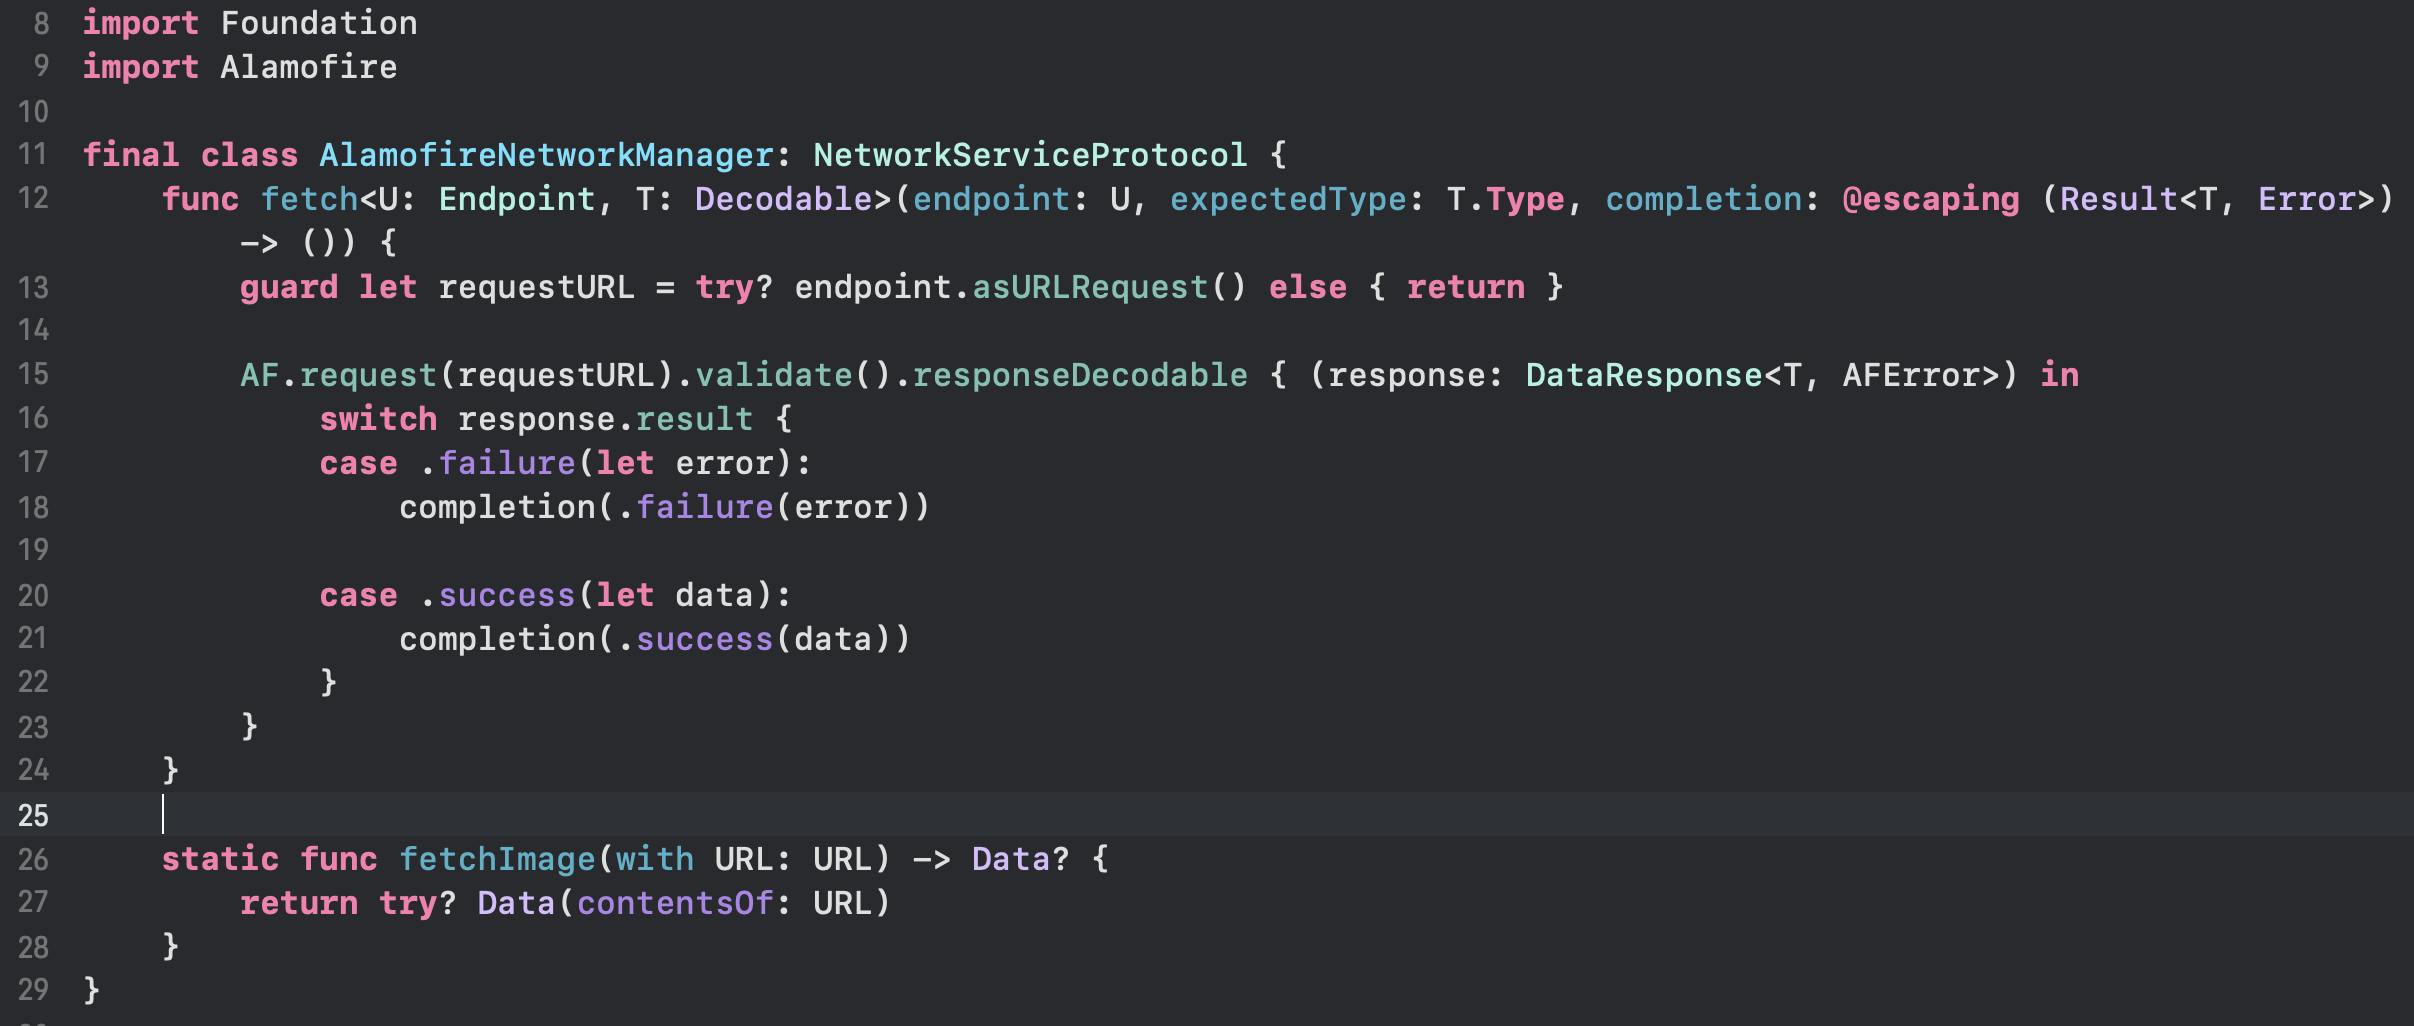
Our fetch() function is used to make the network request needed for the passed endpoint, the request object contains everything needed for the call as set in the Endpoint protocol. Thus, you only need this function to fetch any type of data with any type of request (GET, PUT, POST, etc...).
Our static fetchImage(with URL: URL) function is used to get the image of the article with the URL passed, we can use other 3rd party libraries that handle this situation or even build a custom function to have more control over the image request, but this will do the work.
MVP UI Design Pattern
After building our network layer, let's start populating our Main screen's Presenter. We start by defining the protocol for the presenter, we will call it MainScreenPresenterProtocol, then create the MainScreenPresenter and let it conform to the MainScreenPresenterProtocol protocol, as MVP states, in the presenter, we have a reference to the view that the presenter controls, the view is also of type MainViewControllerProtocol which is created for the MainViewController file, since both the view and presenter have a reference to each other, we need to set one of those references as "weak" to stop any retain cycles from happening. In this case, we set the view inside the presenter to be weak. Then, we define the needed functions that the Main view will use from the presenter in the MainViewControllerProtocol and the needed functions that the MainPresenter will use from the view in the MainViewControllerProtocol.
Our MainViewPresenter file should look like this:

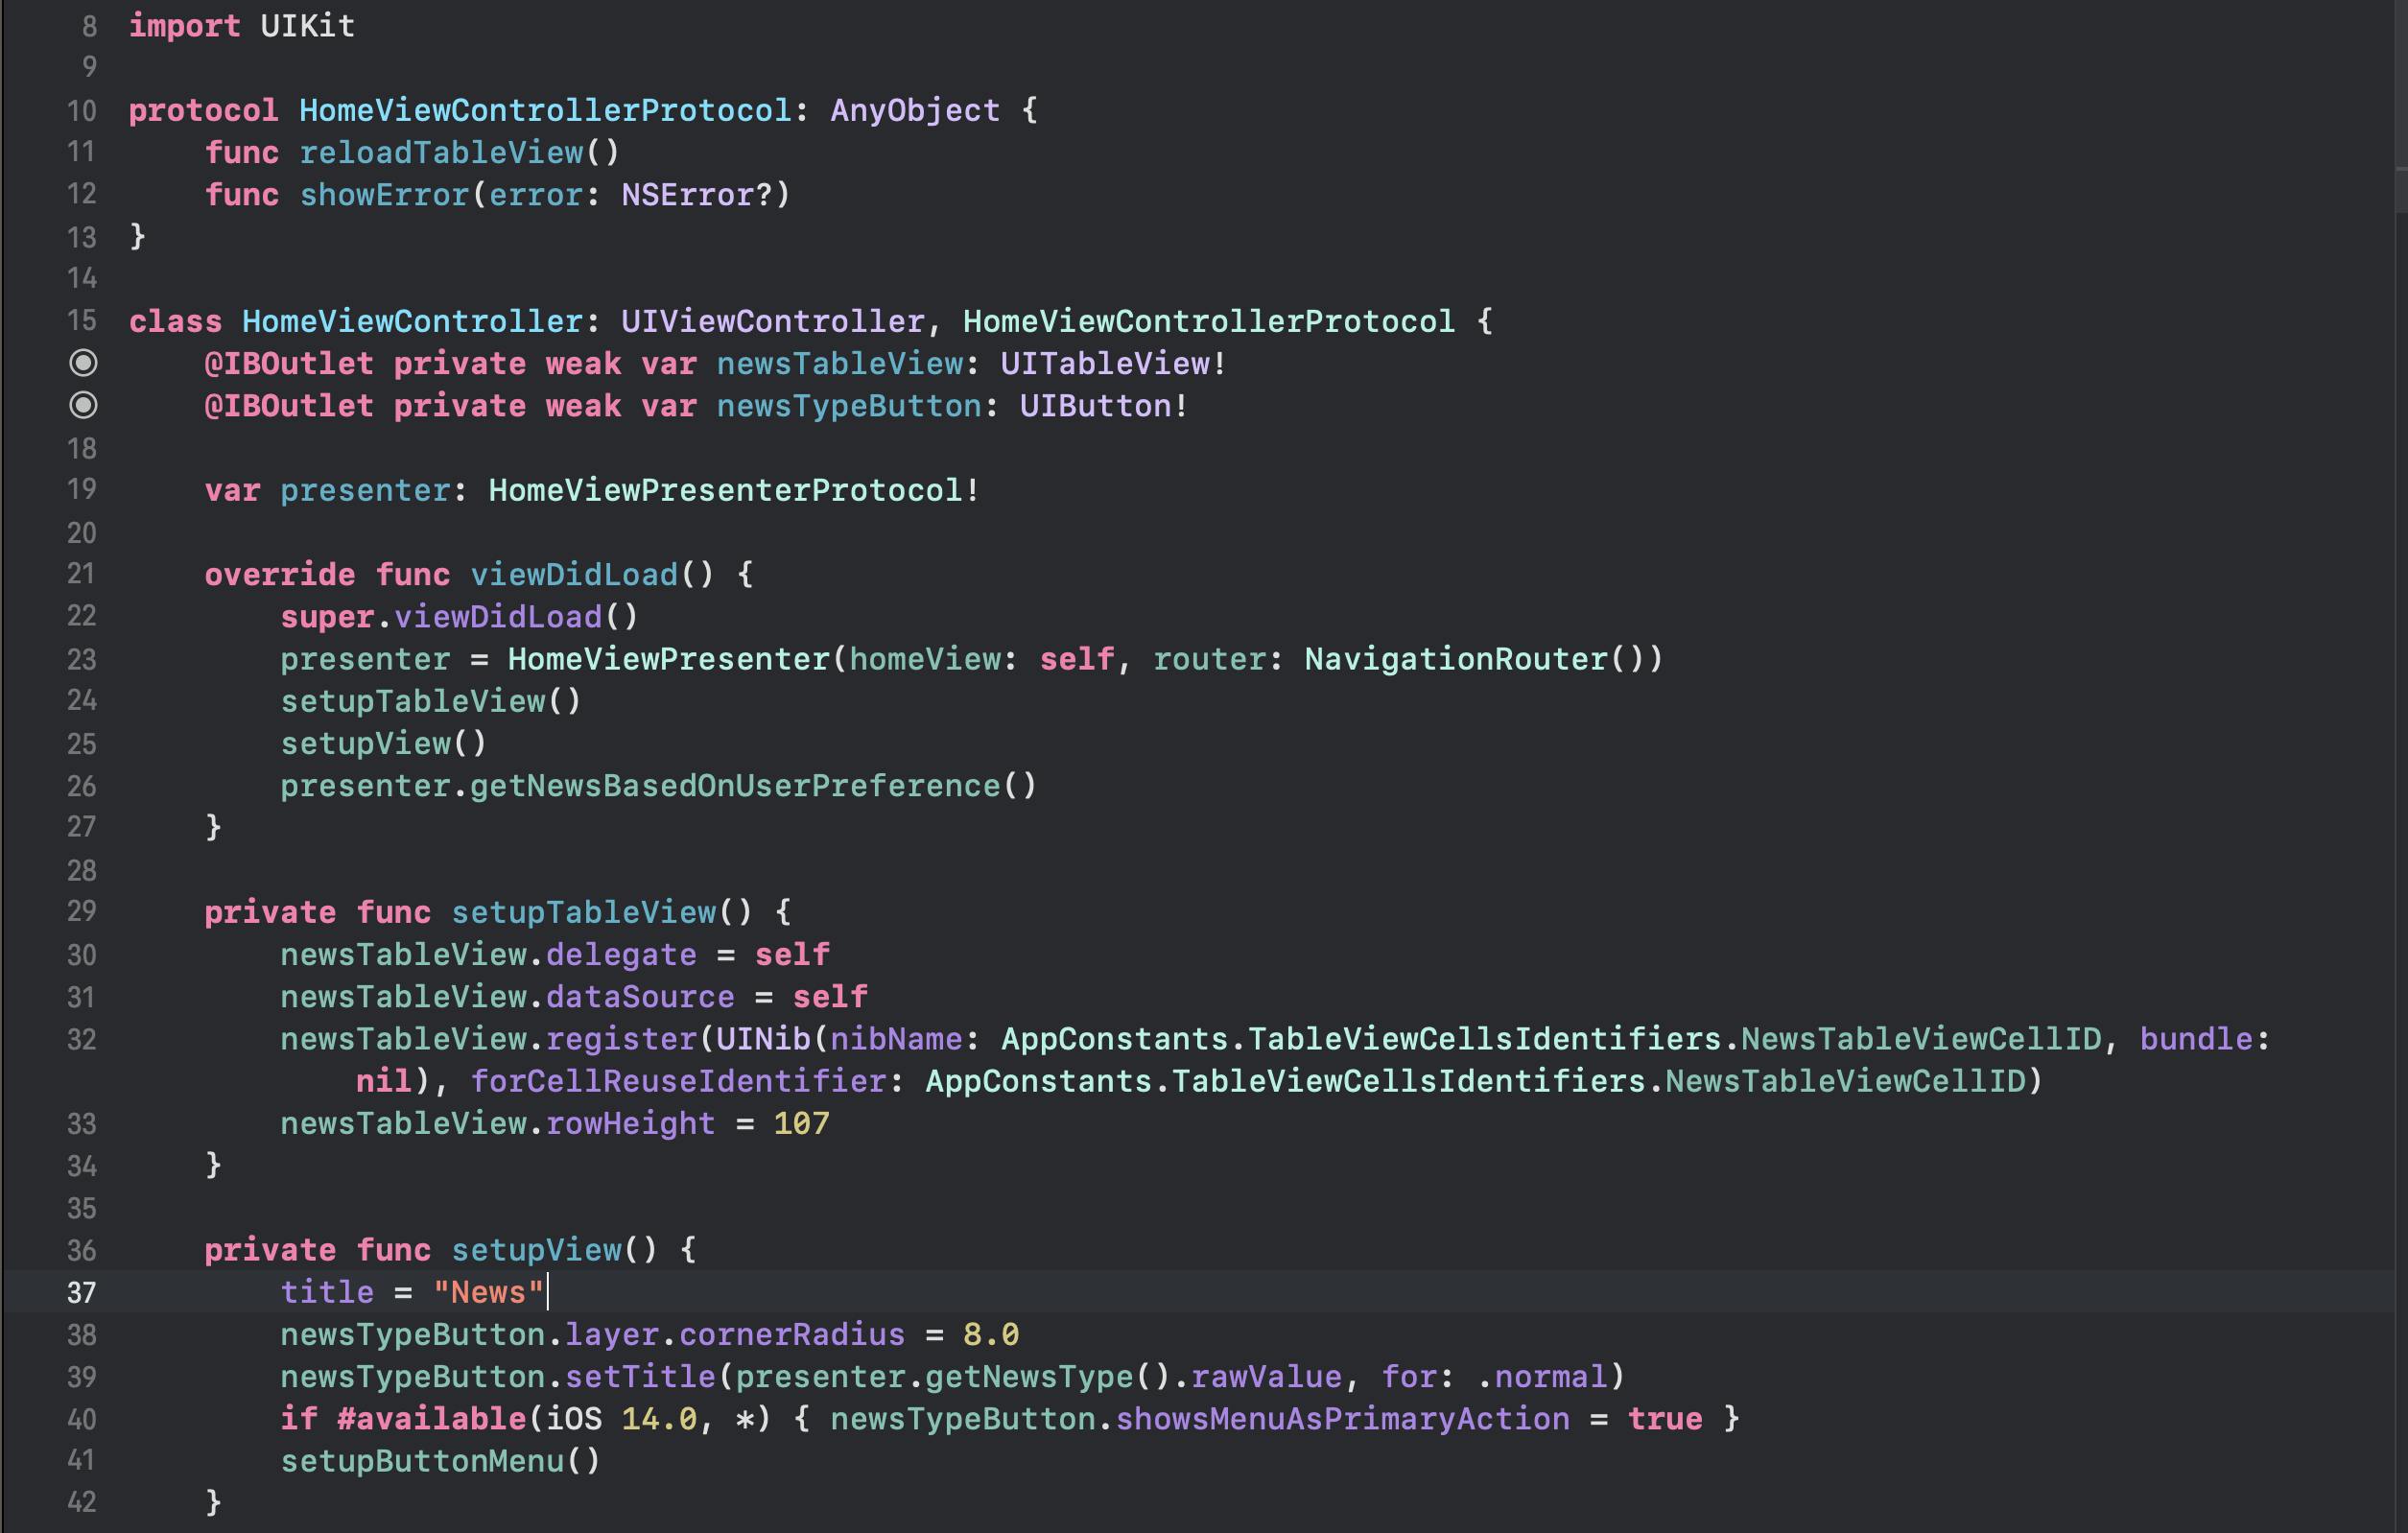
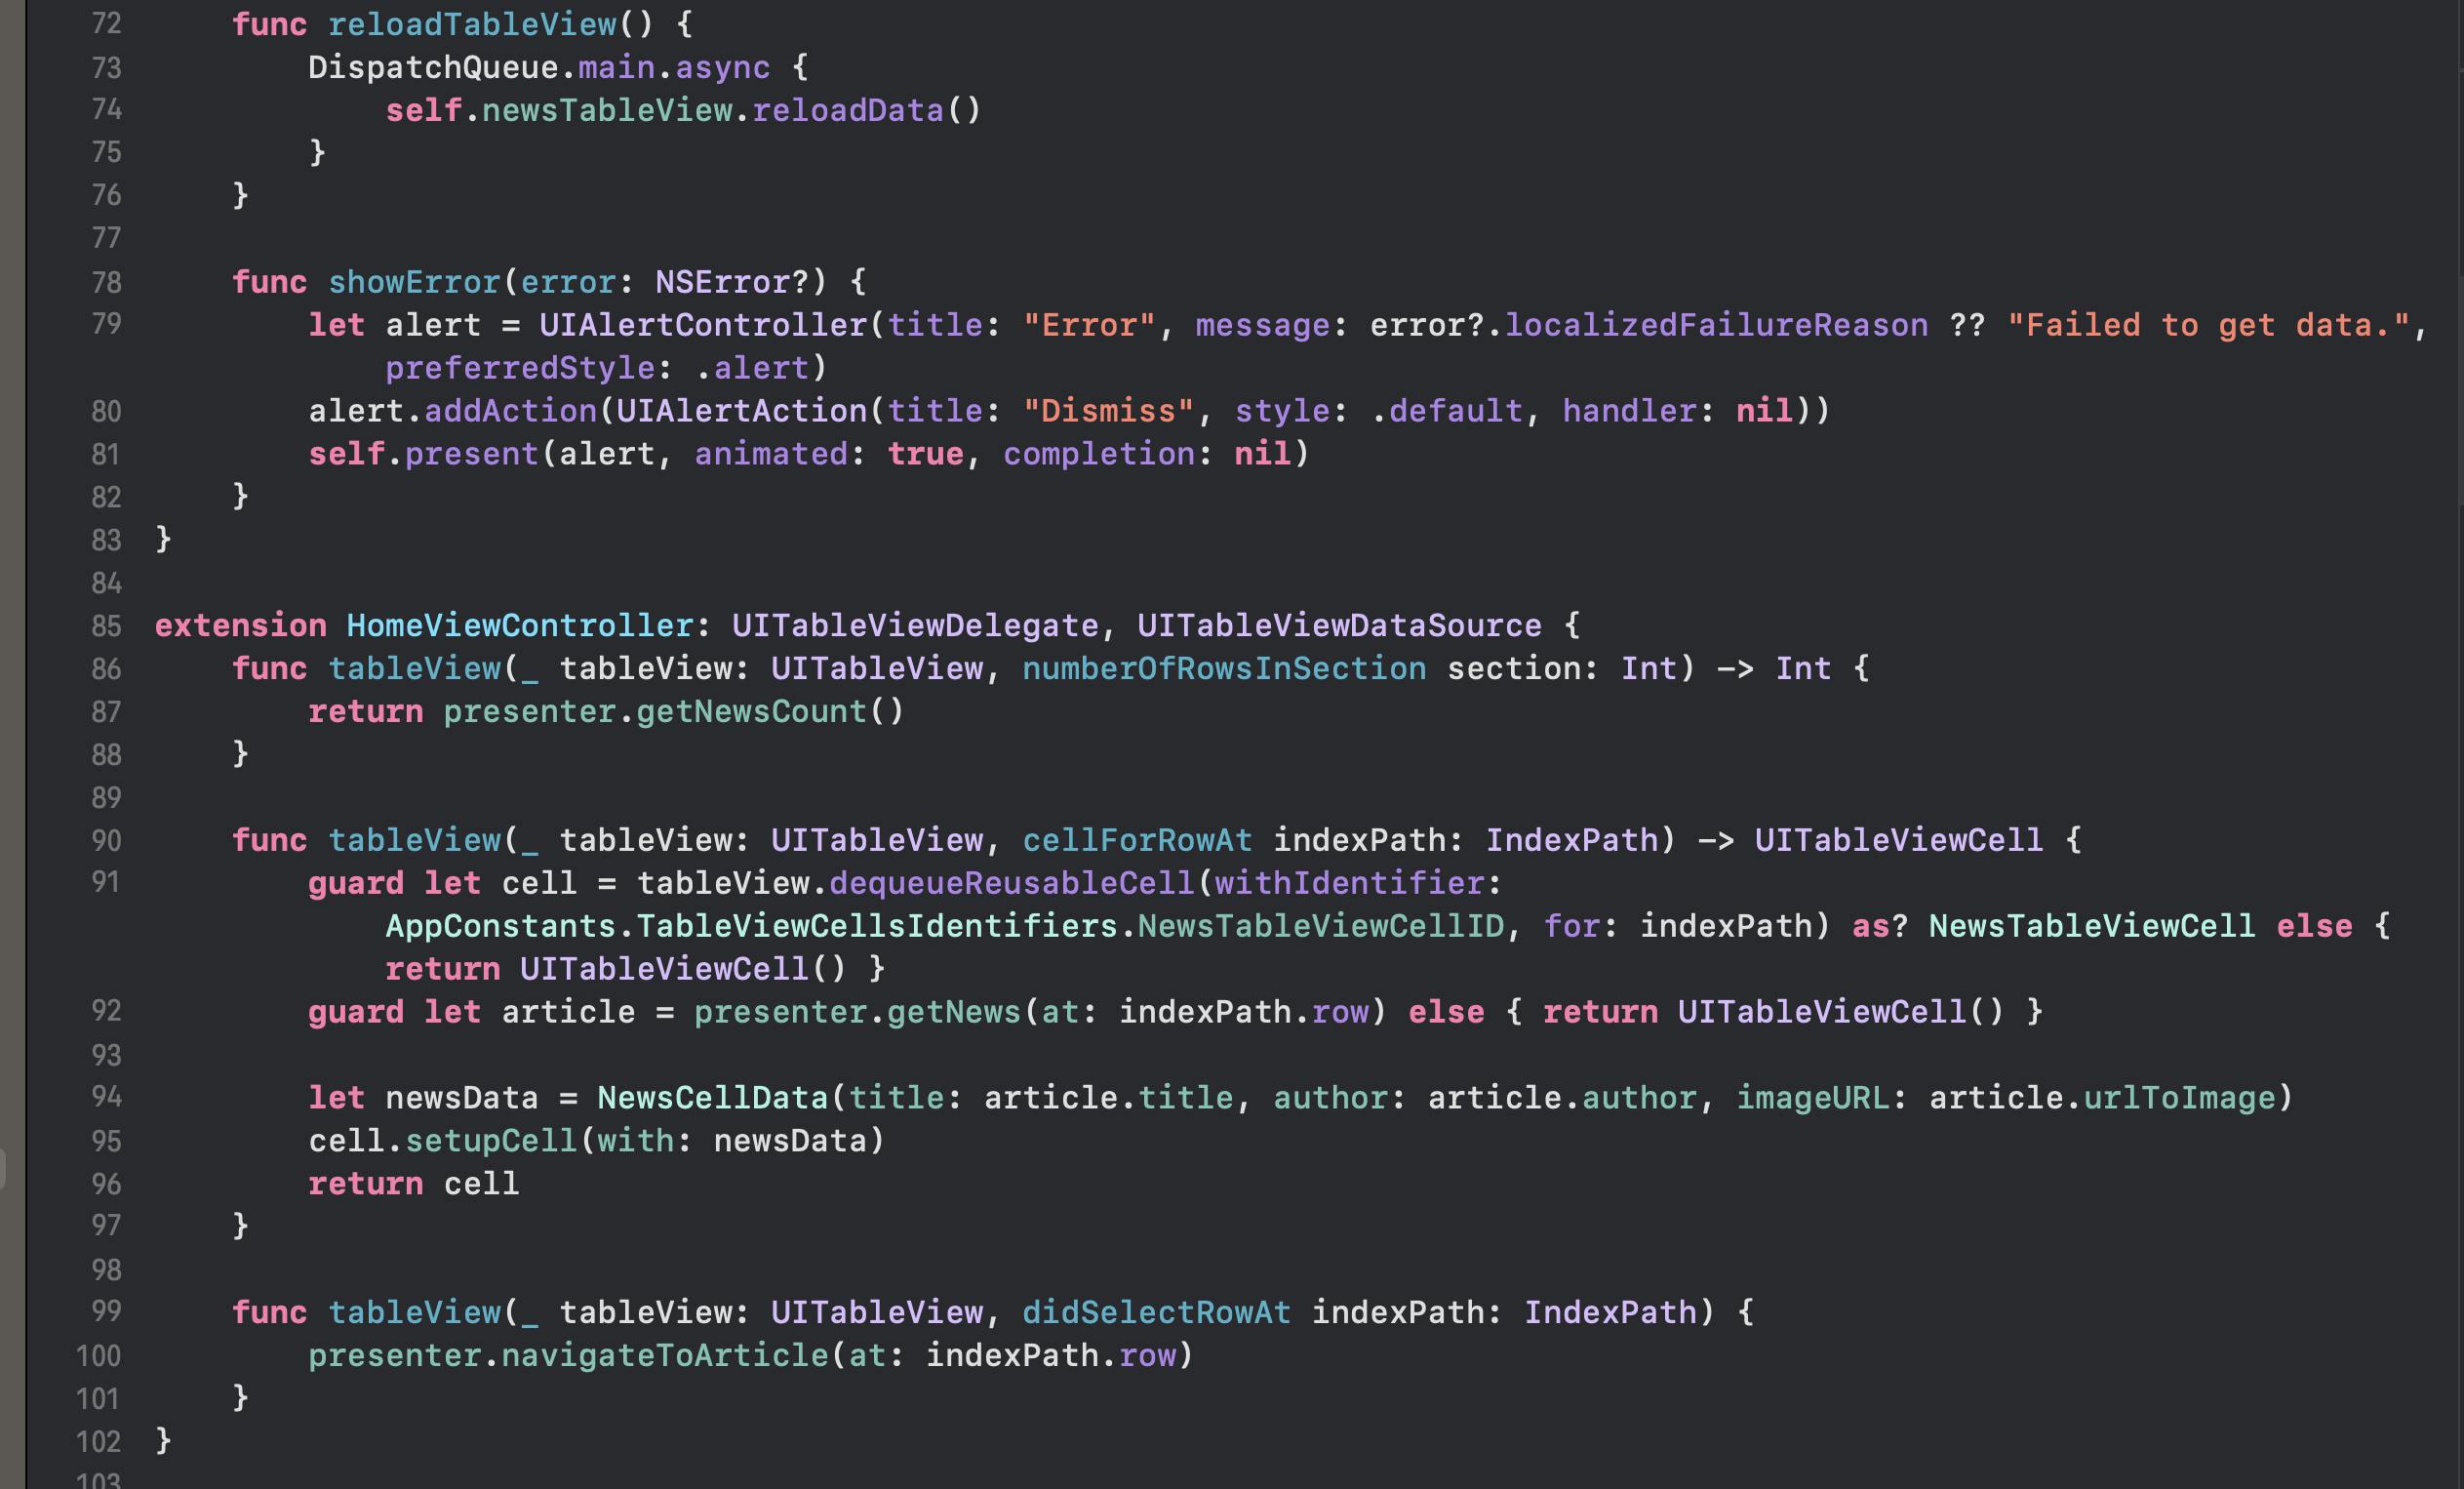
And our MainViewController file should look like this:
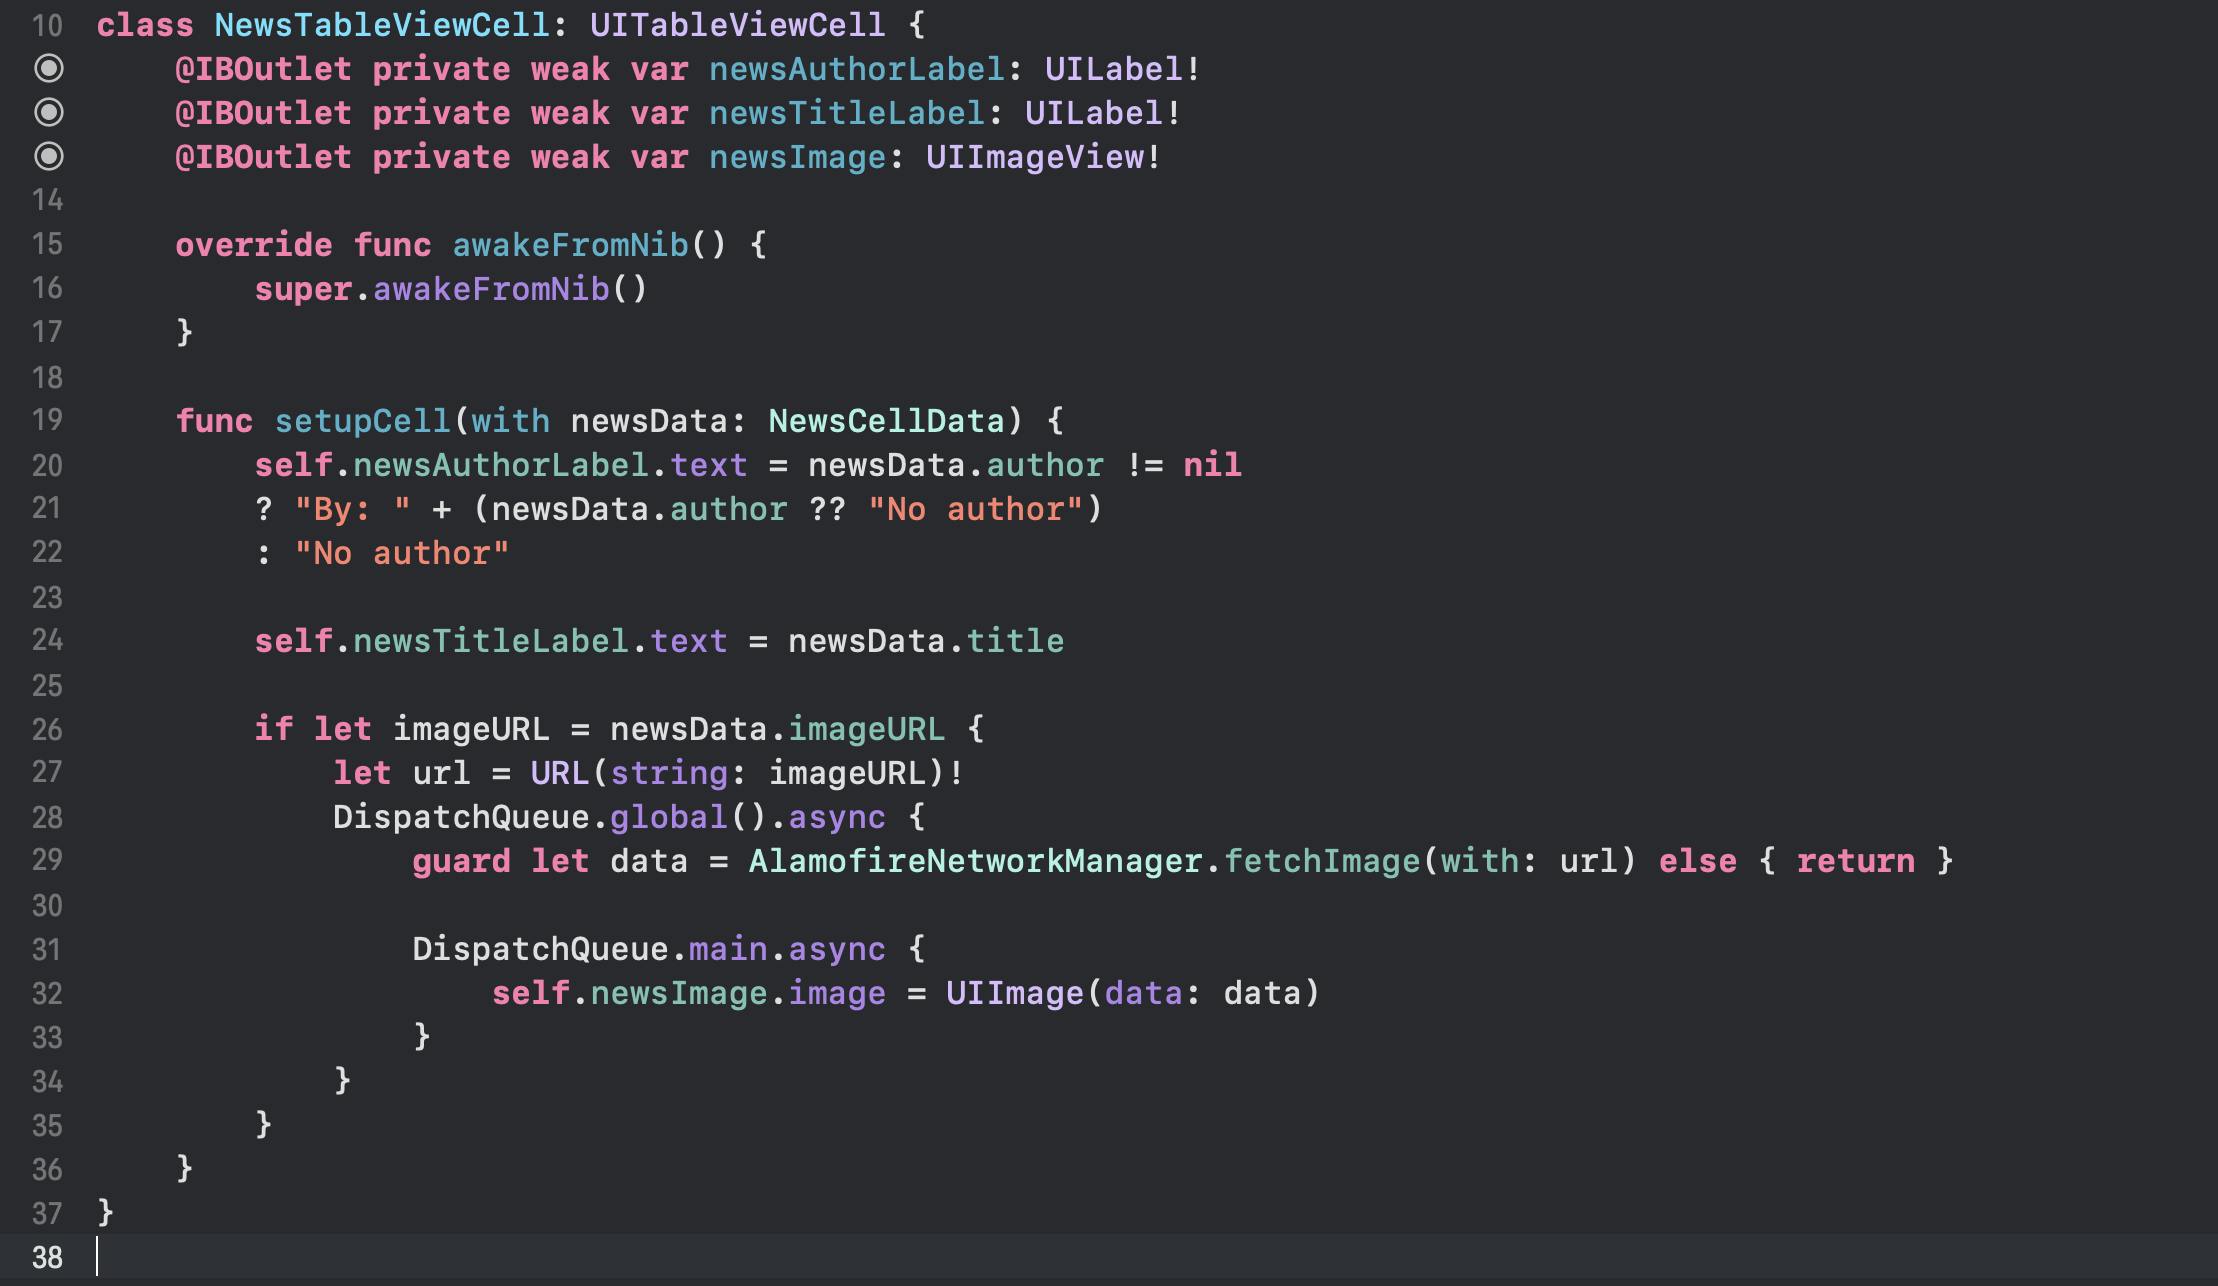
And finally, our NewsTableViewCell file should look like this:
Database Layer
For our project, we won't be implementing this component, but the idea is clear, create a manager that conforms to the DatabaseProtocol with the defined functions. Later, we will inject it into the Interactor component to be used there.
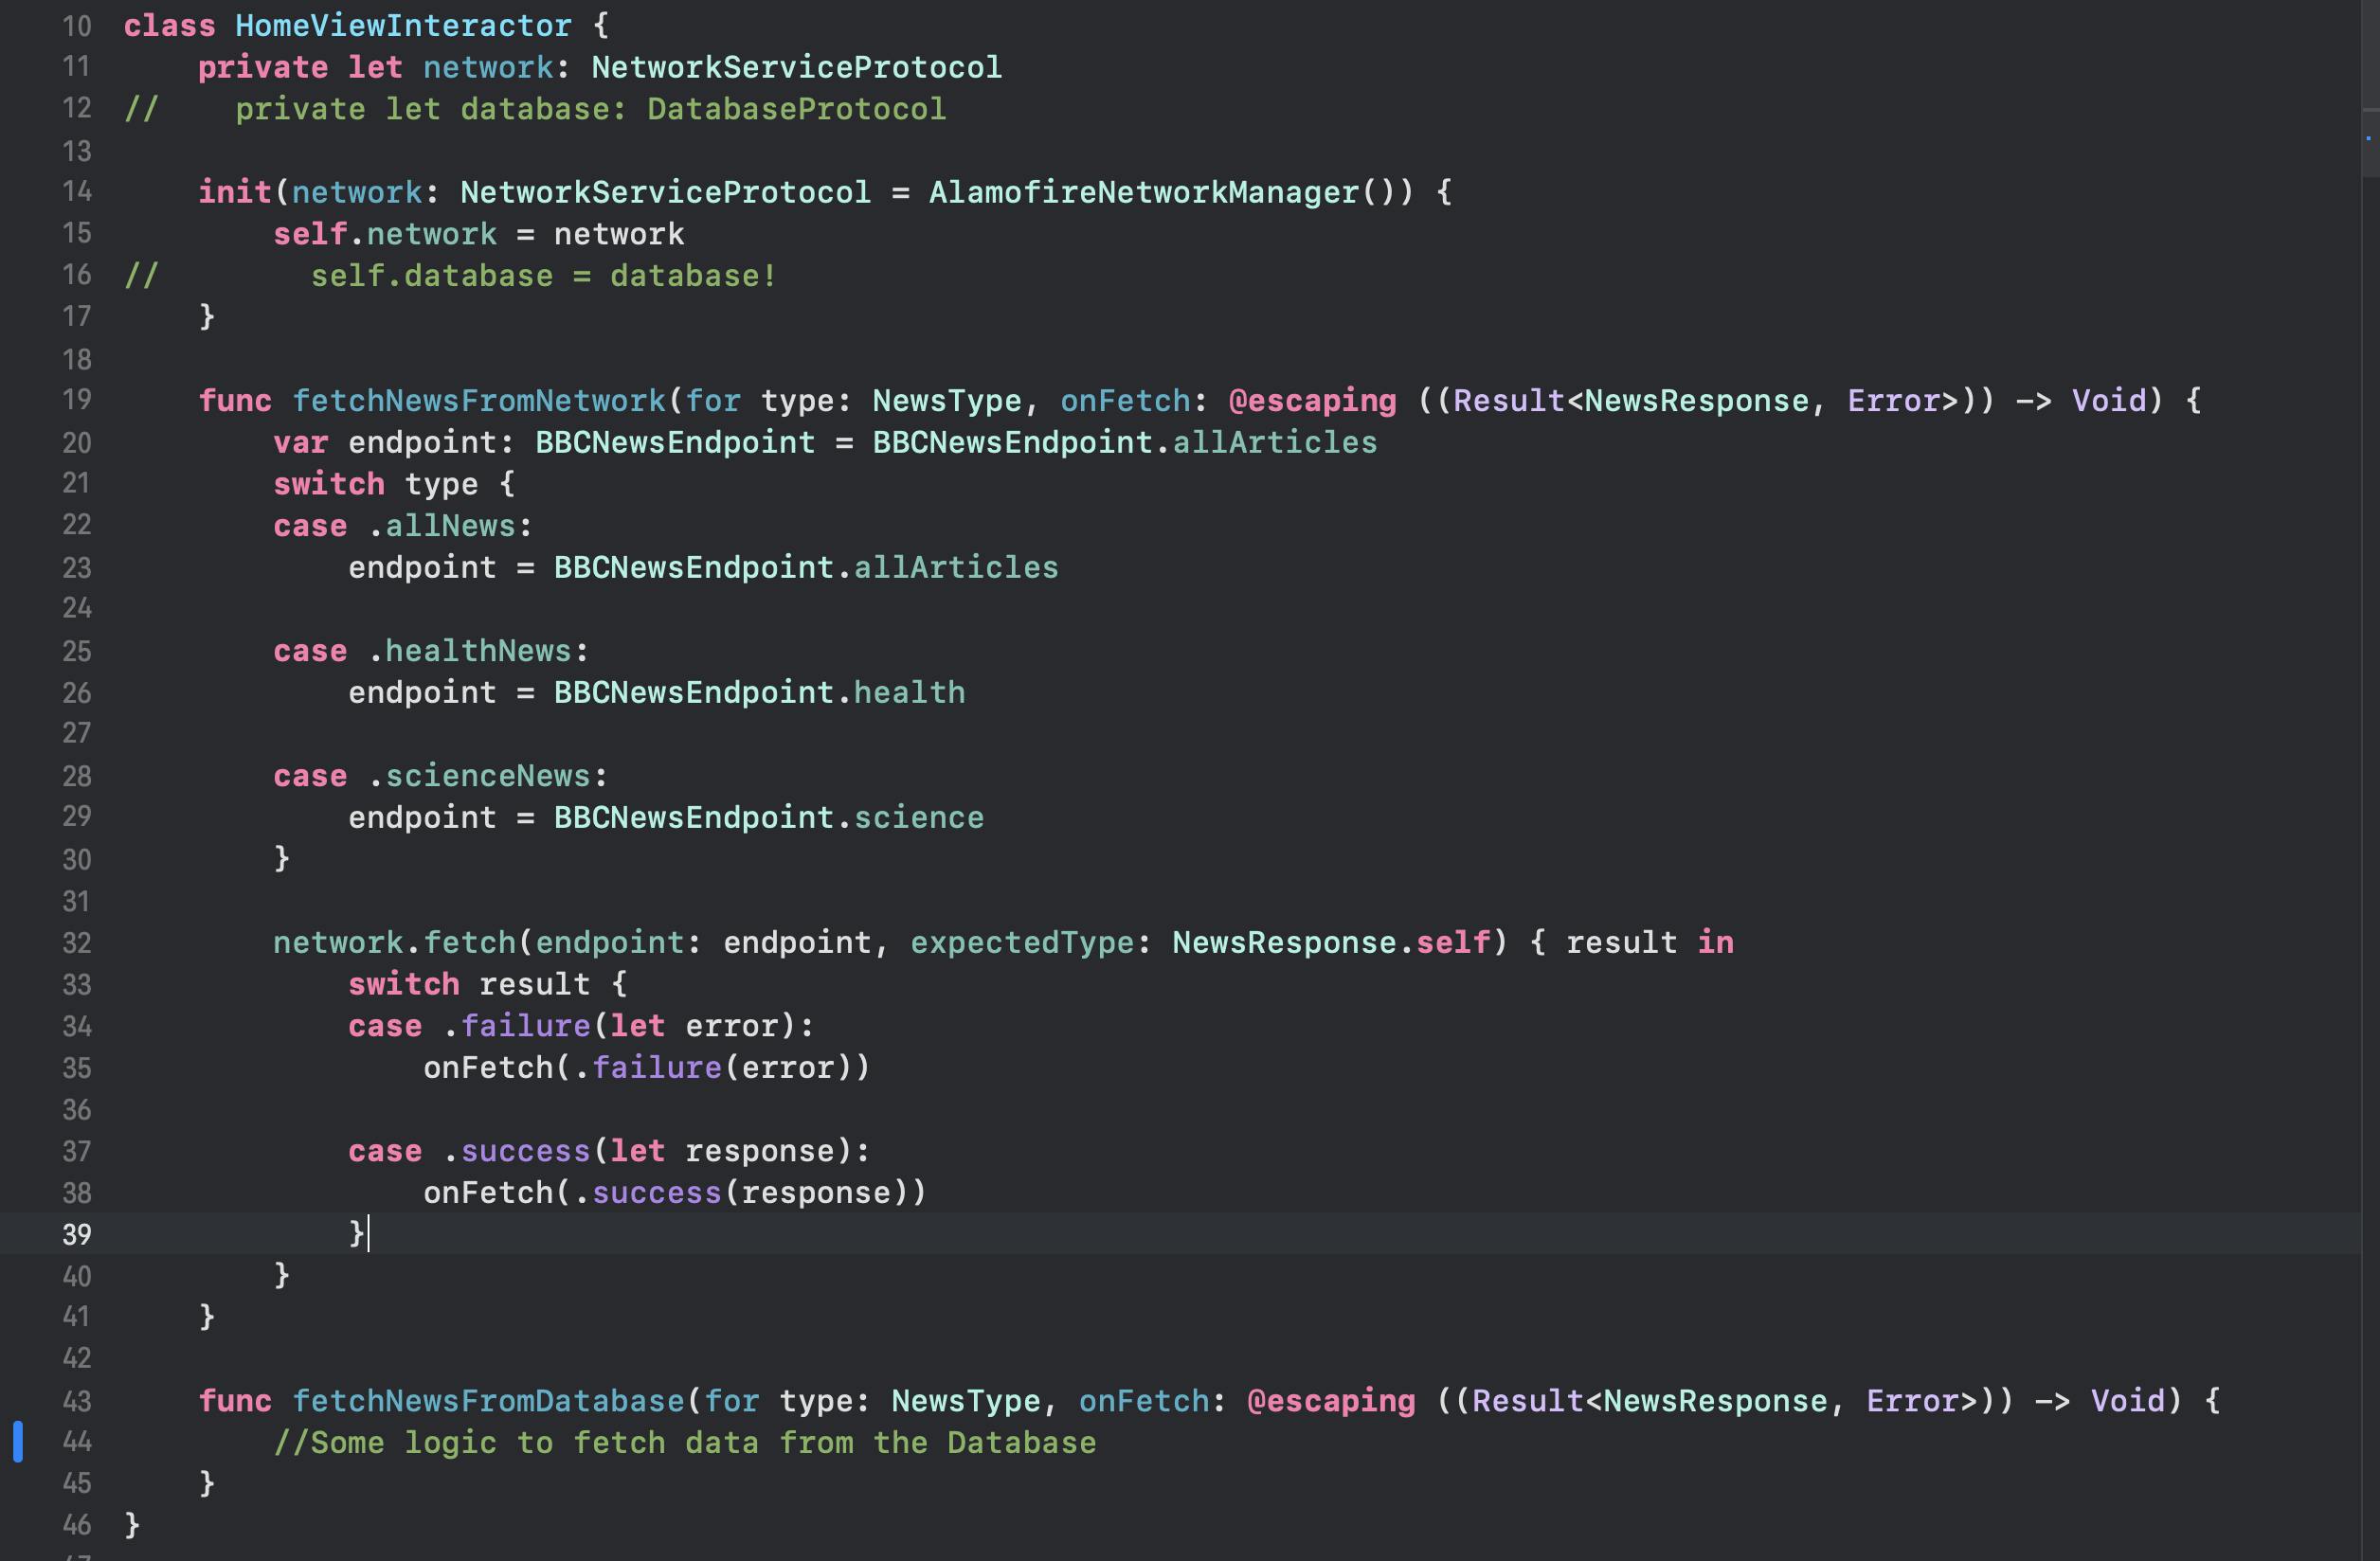
Main Interactor
Now, let's create our main screen Interactor, which contains references to our network and database components and allows us to get the needed data based on the user interaction and the app flow. We will use it directly instead of creating UseCase objects to do our requests.
Quick catch about UseCase -Click to expand-:
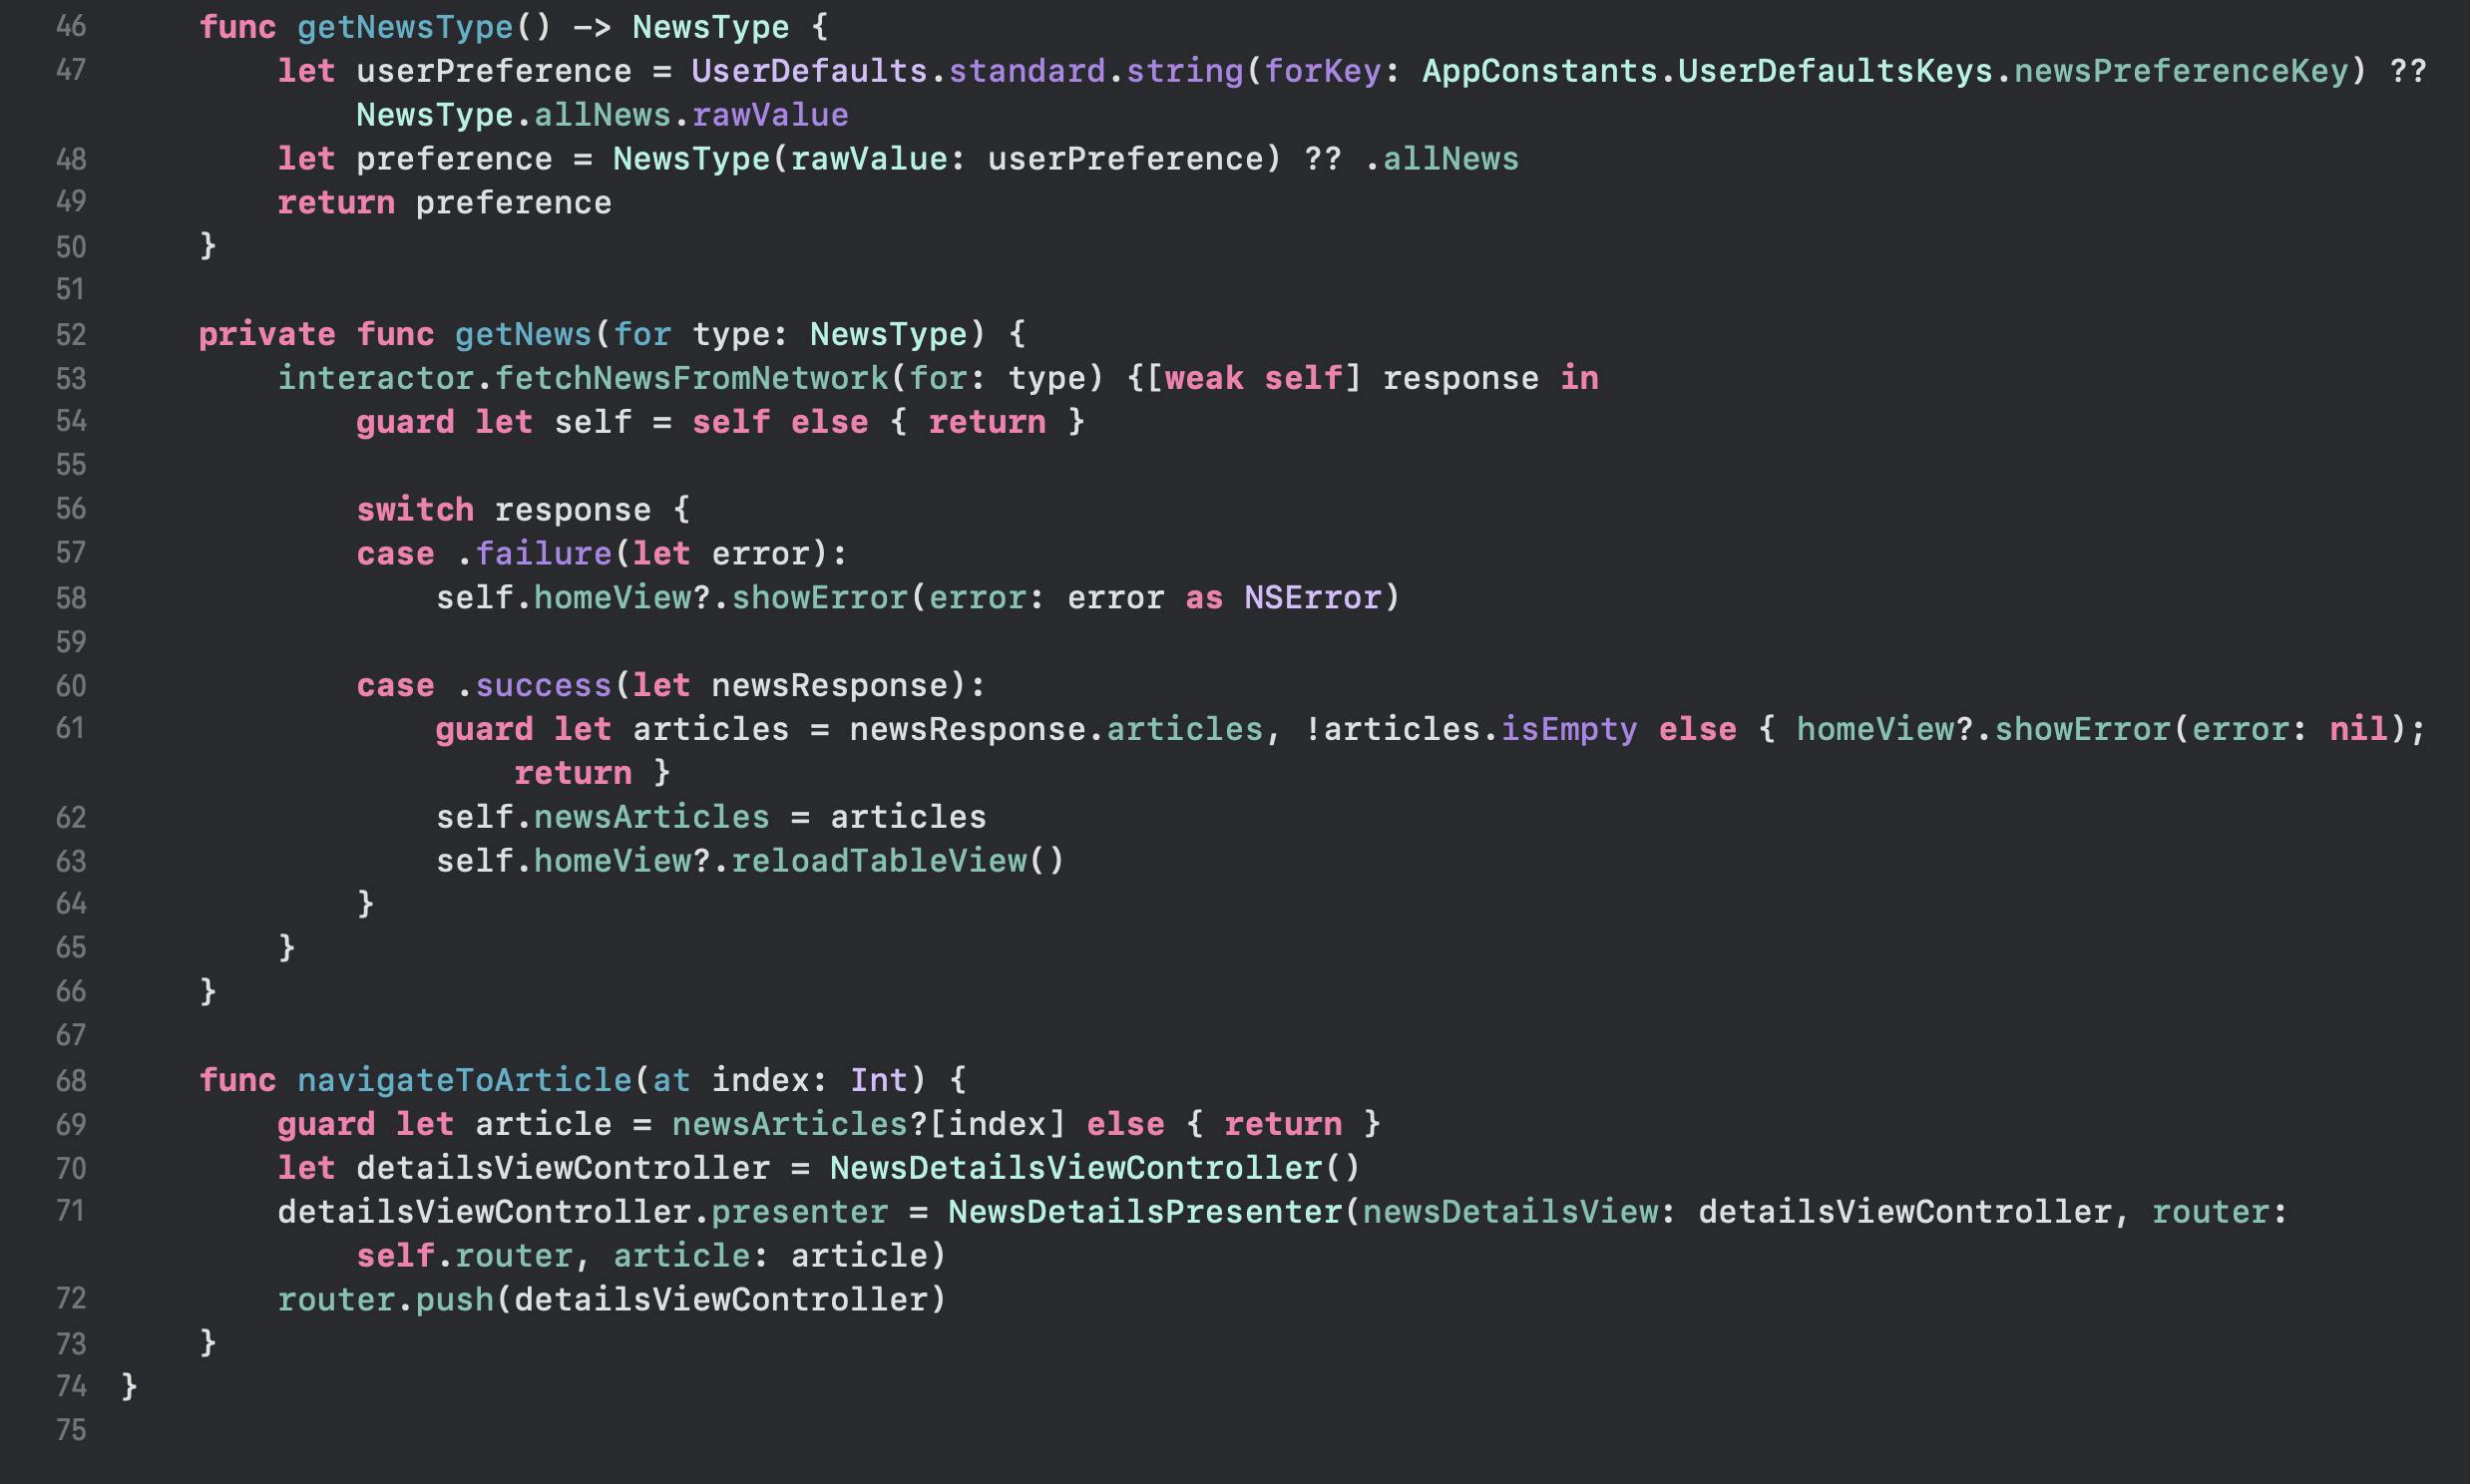
Our MainViewInteractor file should look like this:

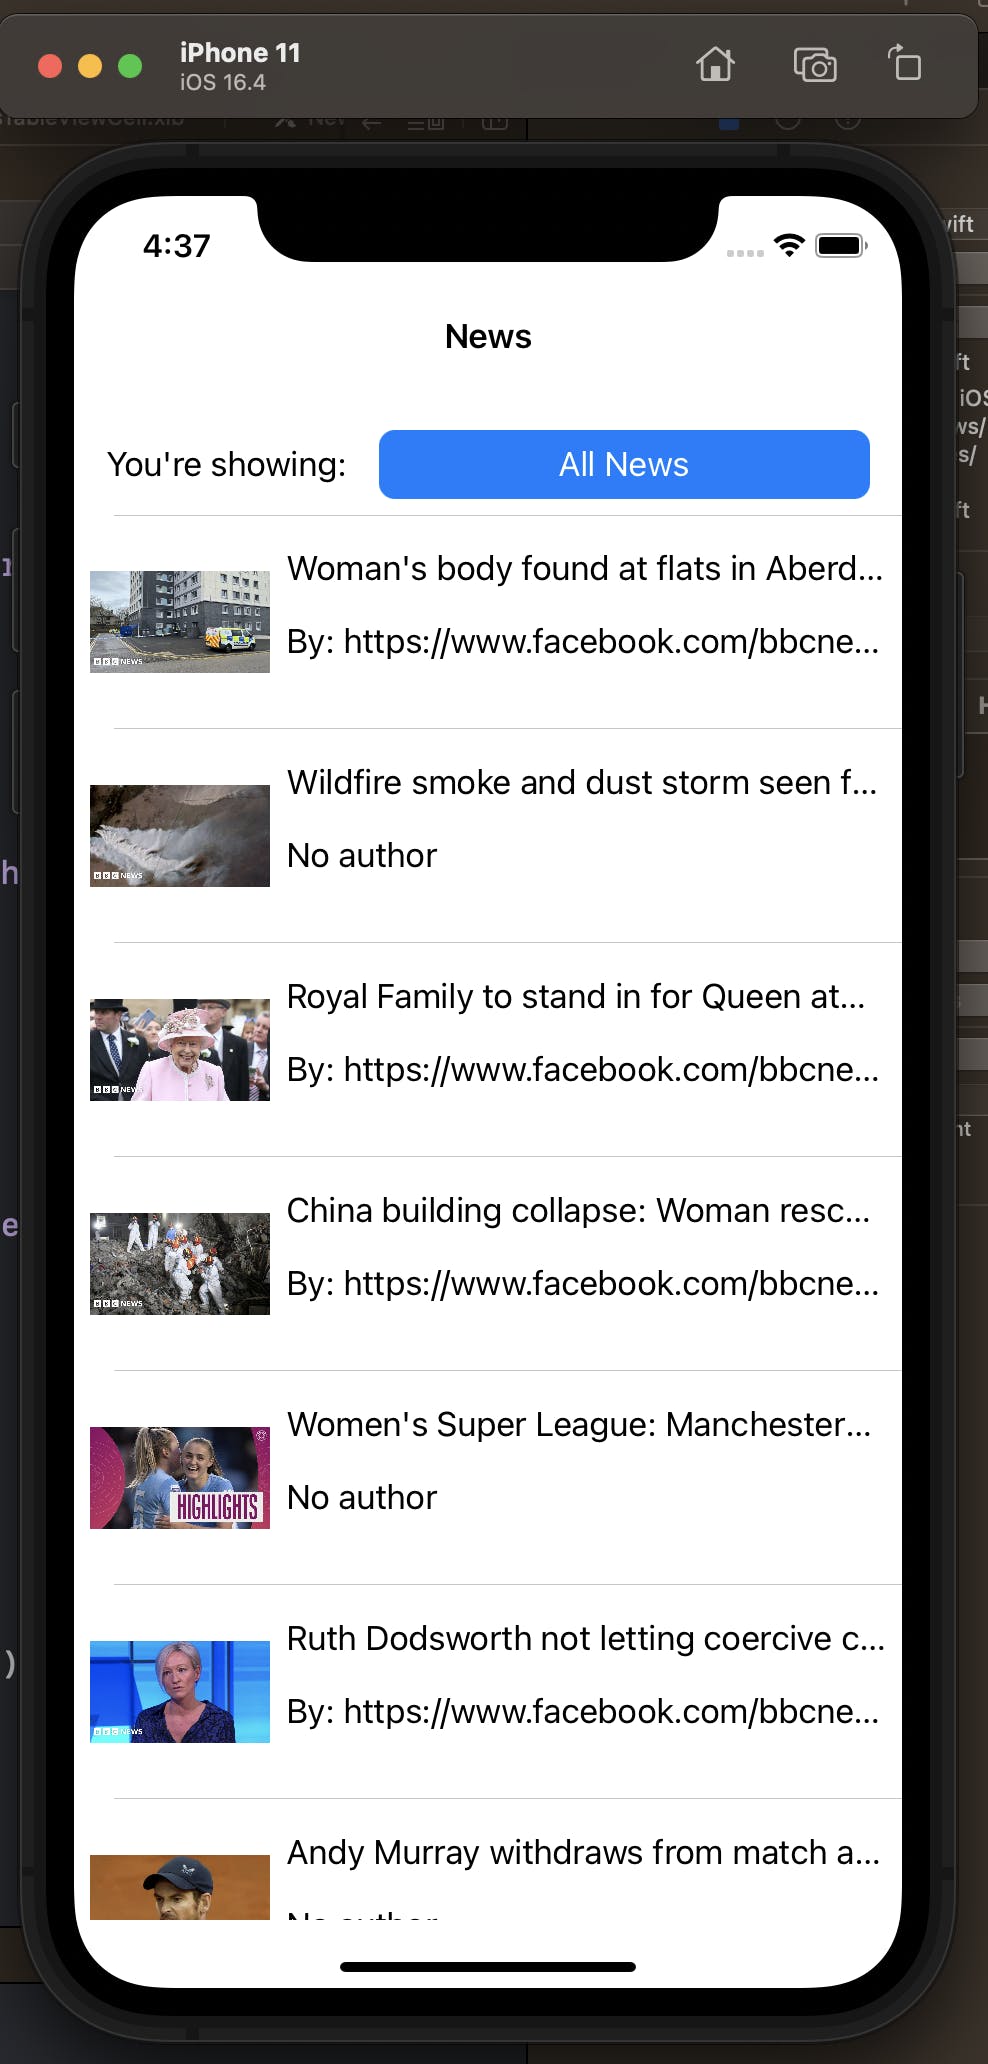
Now if we run the app, we will get the following result:
And we can simply change the type of news from the dropdown button.
Details Screen Implementation
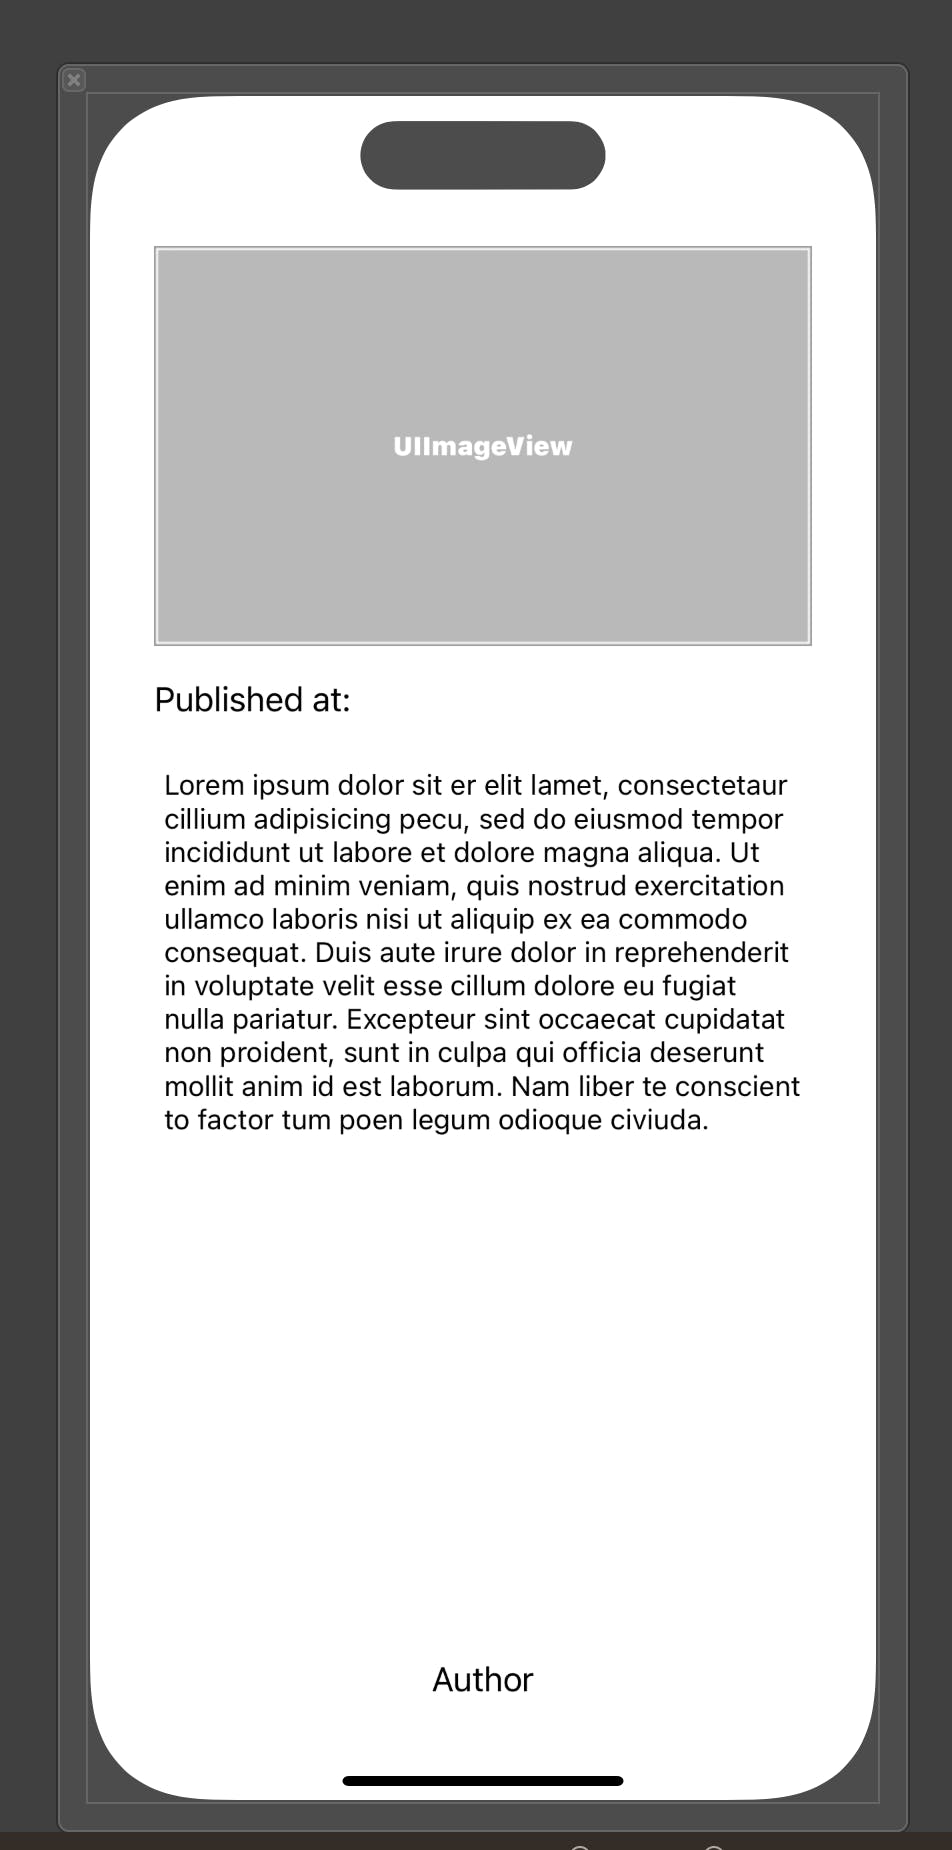
Moving on to the details screen, this is the design of the screen:
And from the definition, the details screen does the following:
- When the user clicks on one of the news, the user is redirected to a detailed screen that shows all the information for the clicked news.
So, the work for the details screen should be as the following:
Create the NewsDetailsPresenter to handle the logic for the NewsDetailsViewController.
Populate the NewsDetailsViewController with the proper data coming from the MainViewController.
Let's start working on our NewsDetailsPresenter, one thing that we instantly notice is that the presenter here is not instantiated in its ViewController like the MainViewController because the data that the presenter needs is passed from outside (from the MainViewPresneter), so the MainViewPresenter is the one responsible for creating the NewsDetailsPresenter. But what about the NewsDetailsPresenter itself? What should it contain?
As we know, the presenter in the MVP UI Design Pattern is responsible for containing the model that will be presented on the view for the user, so it definitely needs an Article data model that's passed from the MainViewPresneter. Also, all presenters should have a router for navigation, so this is also passed from the MainViewPresneter. And finally, the view that the NewsDetailsPresenter will manage, which is the NewsDetailsViewController.
The NewsDetailsPresenter will be responsible for passing the needed data to the NewsDetailsViewController to set up the UI, the NewsDetailsViewController should know nothing about our data models.
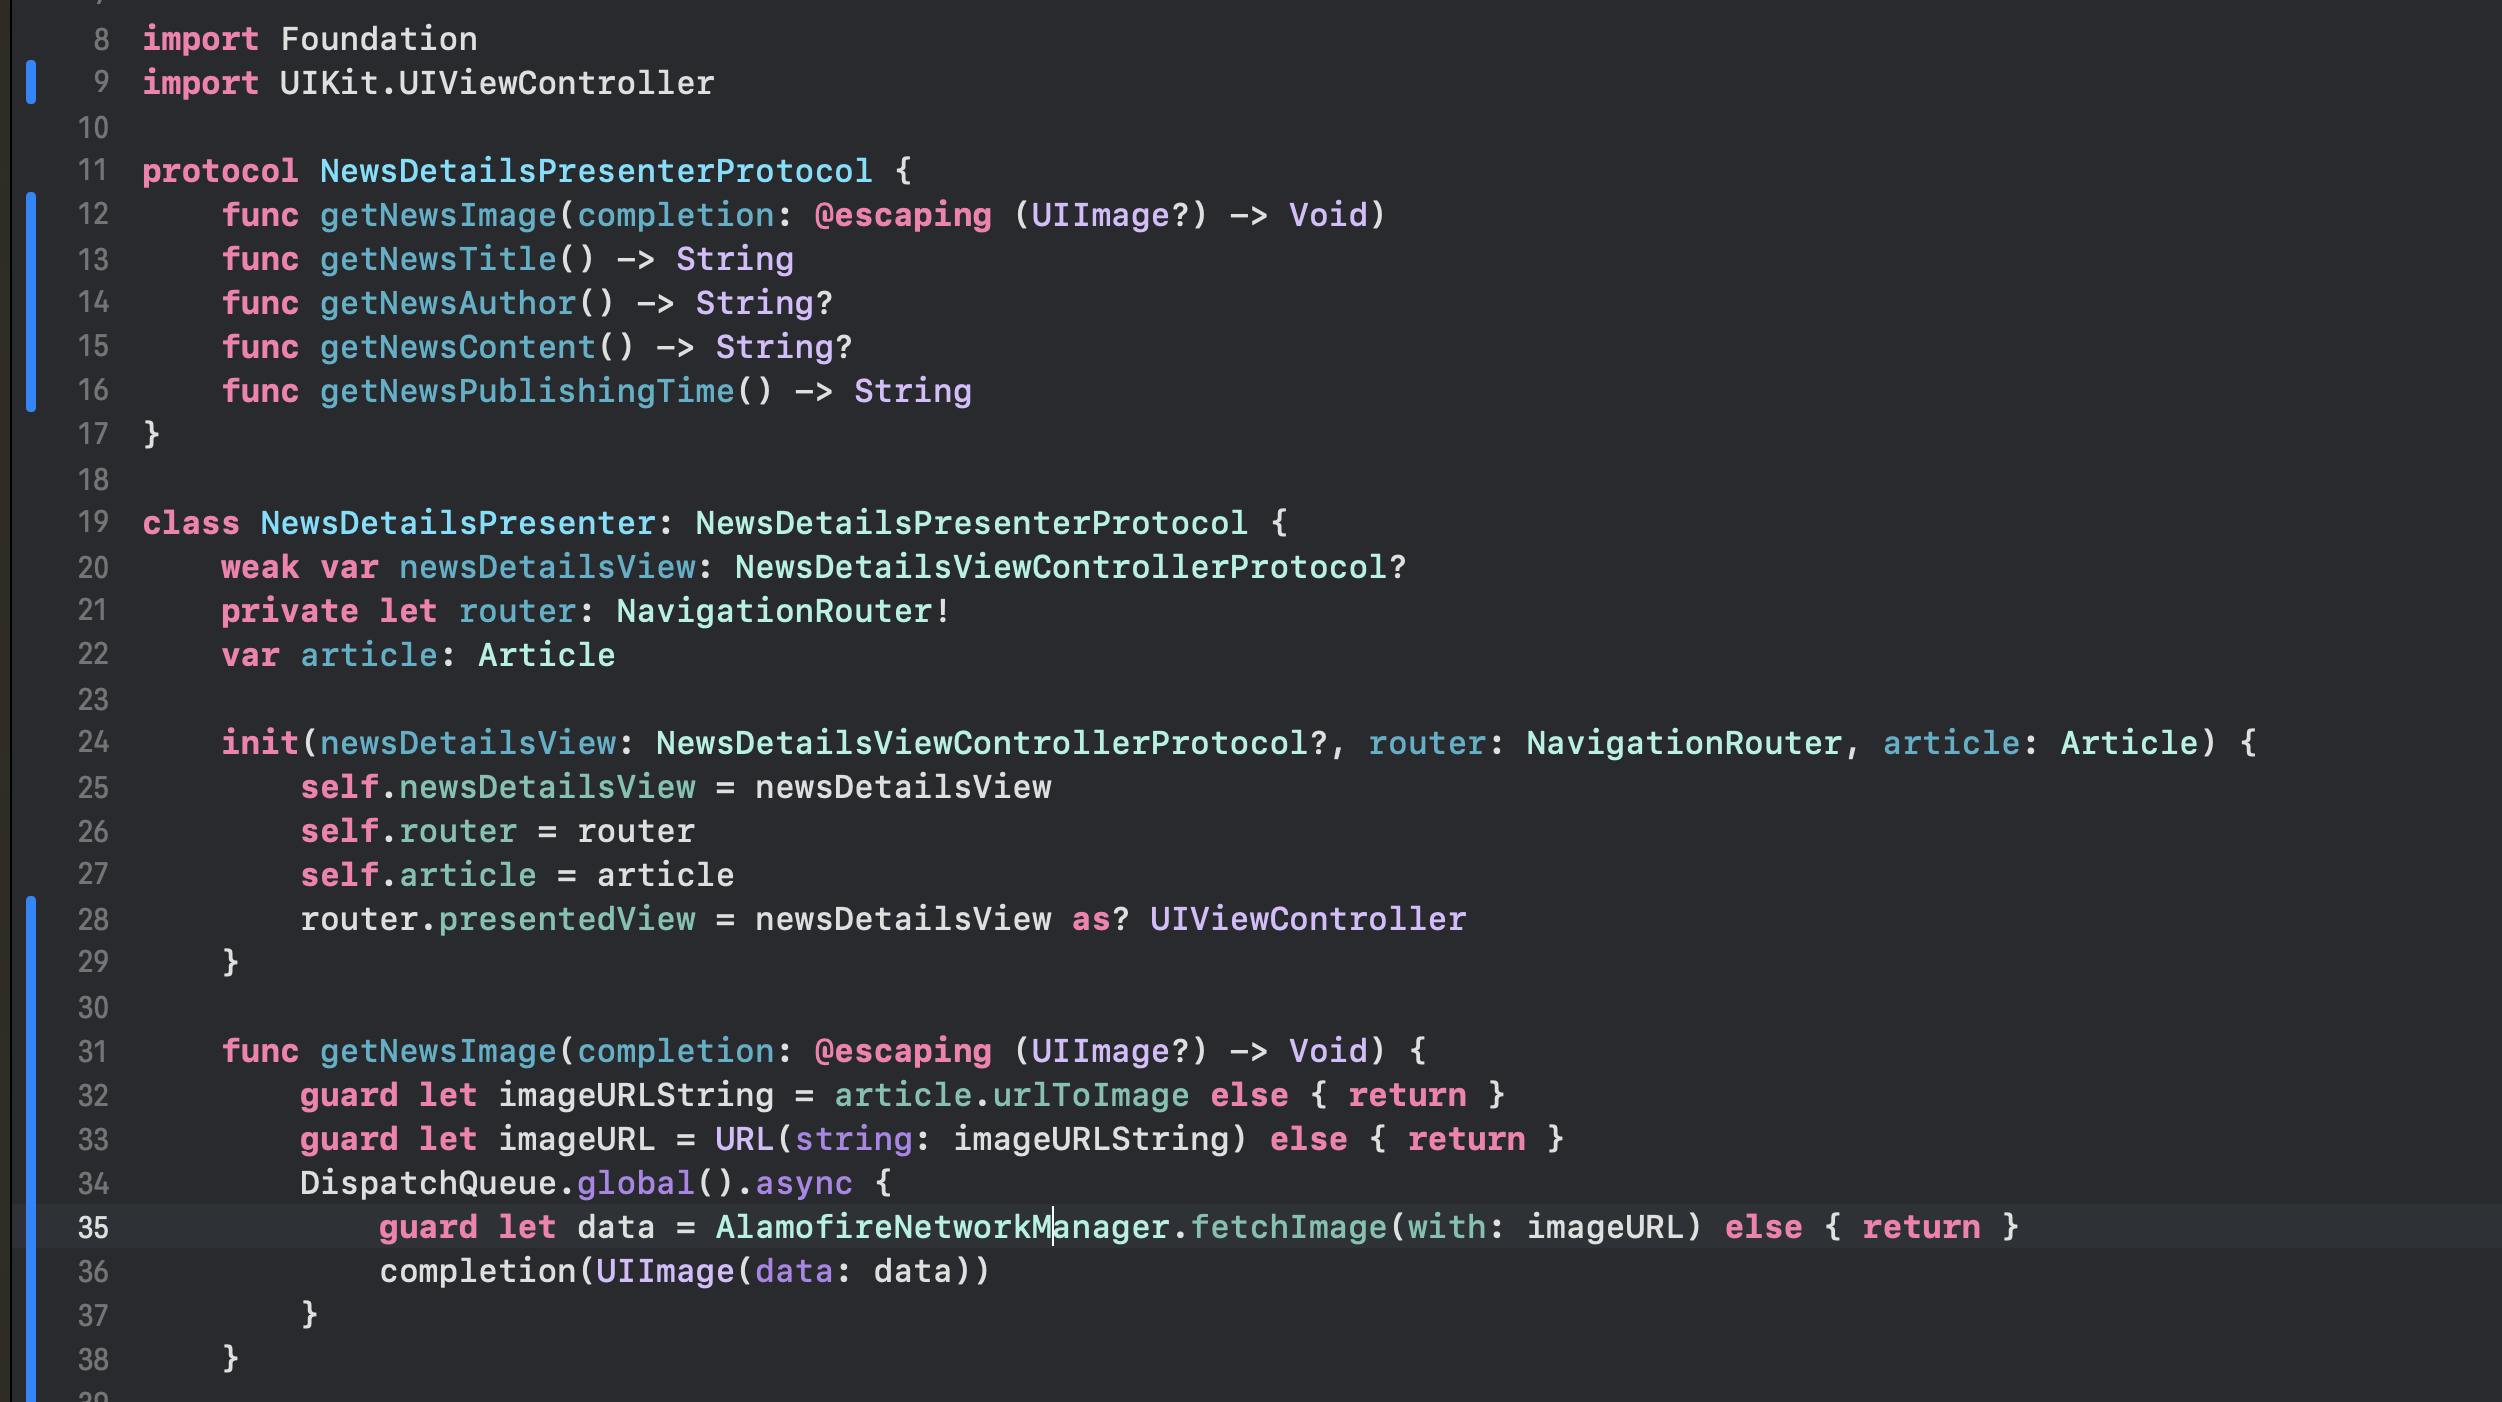
Our NewsDetailsPresenter file should look like this:

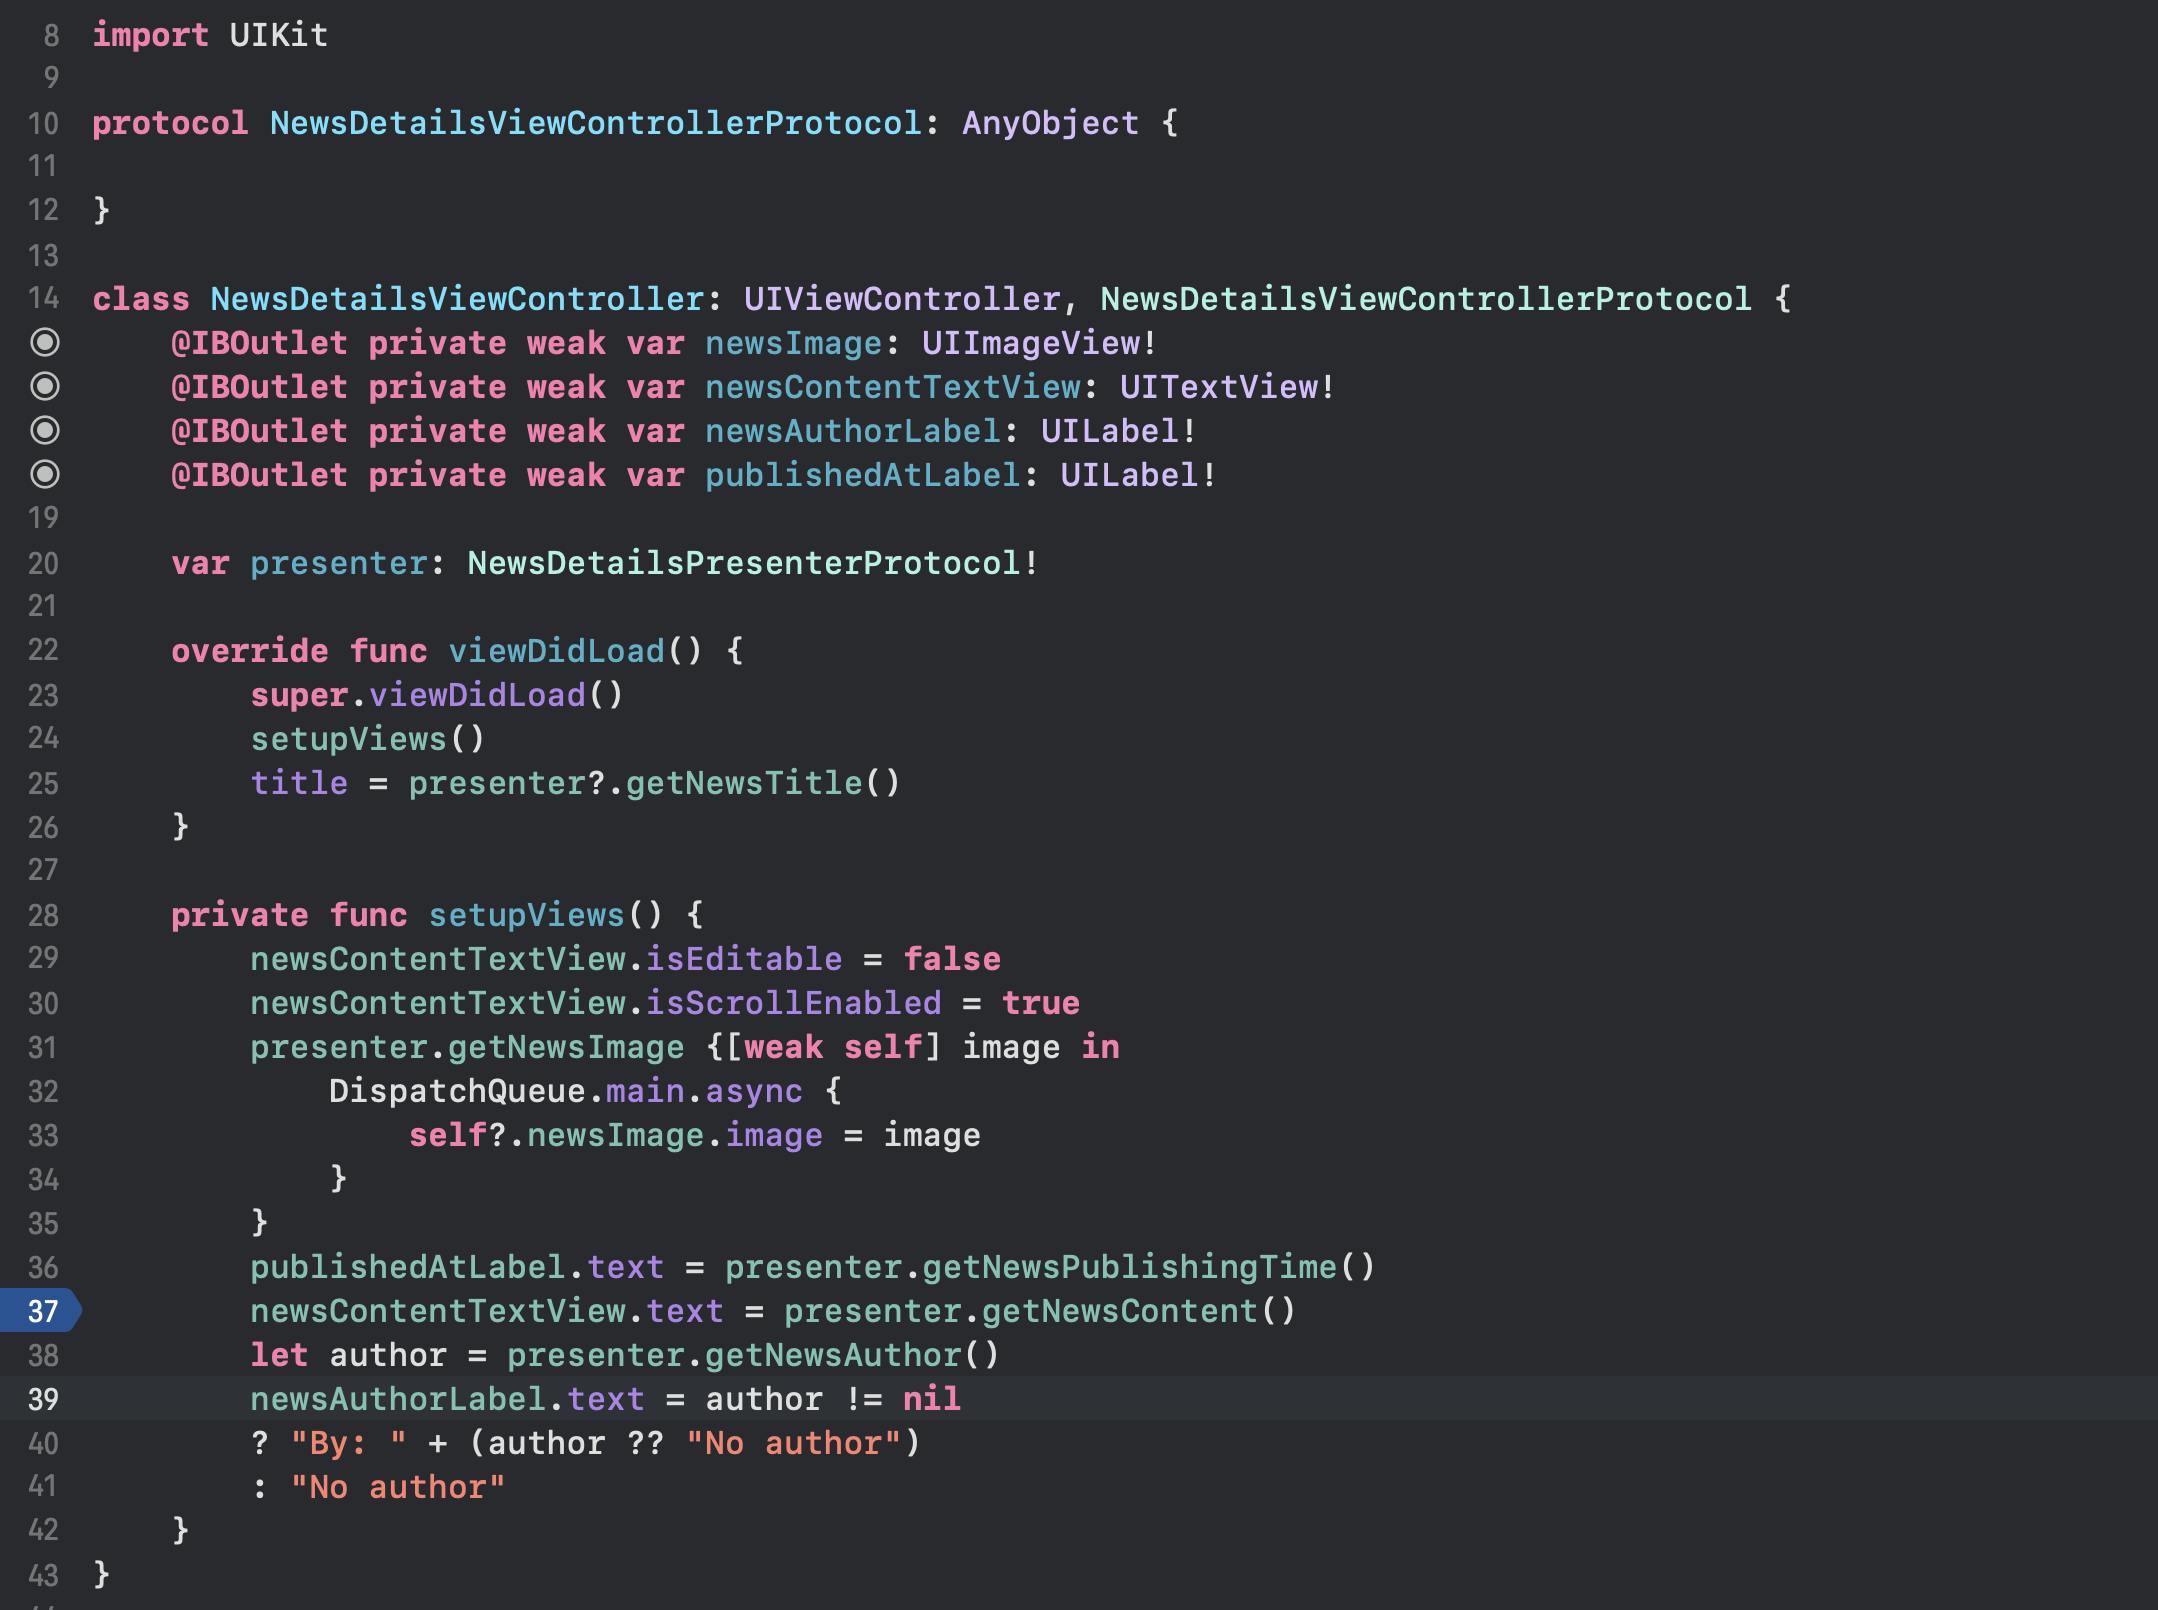
And our NewsDetailsViewController file should look like this:
And the news details view should look like this:

Conclusion
We have successfully created our News App using the Clean-MVP architecture!
From this article, you can deep dive into more concepts of Clean Architecture and how to implement them into other UI Design Patterns and include more and more of the Clean Architecture concepts and principles into your code.
You can find the project we built in this article on my GitHub at this link, I would be very happy if someone wants to contribute to this project on GitHub.
If you enjoyed this article and found it useful, please share it with your friends and connections, I'd also be very happy if I got an endorsement from you on my LinkedIn here after this article :)